Live Events
Broadcast and present a Live event.
- Ways to broadcast a Live event
- Join the Live Studio
- Add a virtual background to your Webcam event
- Encoder stream bit rates
- How do I broadcast using an encoder?
- Live stream bit rates
- Presenter Best Practices
- Share a video during a Live event
- Stream optimization
- Change the event window layout during a live event
- Bypassing Zscaler proxies for improved performance
- Video Bridge Events
- Video Bridge Guide for Presenters and Guest Admins
- Video Bridge Overview (Moderators)
- How do I connect and broadcast using the Video Bridge?
- About Presenter Webcam Layouts on the Video Bridge
- Change the Presenter Webcam Layout on the Video Bridge
- Adding Virtual Backgrounds on the Video Bridge
- Spotlight Presenter Webcams on the Video Bridge
- Hiding Presenters from Appearing on the Video Bridge
- Video Bridge Integrations - Zoom
- Help Video - Testing a Video Bridge Connection
- Help Video - Video Bridge Training for Guest Speakers
- Help Video - Video Bridge Training for Administrators/Hosts
- Video Bridge Tab Mini-View
- Video Bridge Presenter Management Best Practices
- Screen Sharing on the Video Bridge
- Video Bridge Control Room Settings
- Video Bridge Connectivity Guide
- Connecting to Social Media for Live Streaming
- Onsite Encoding Requirements
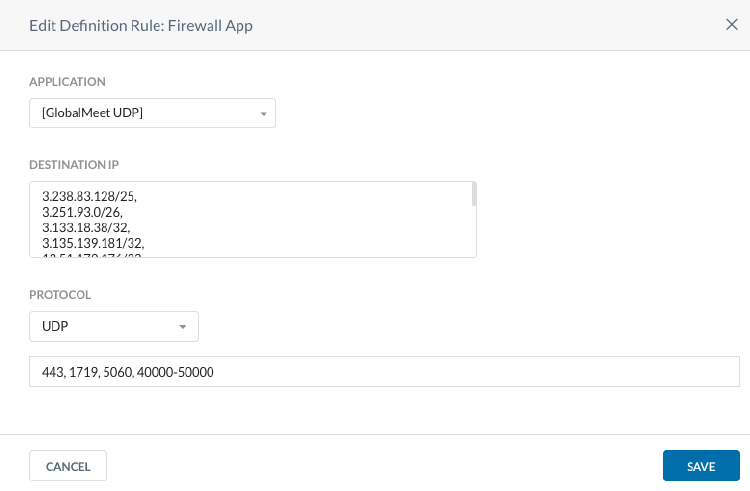
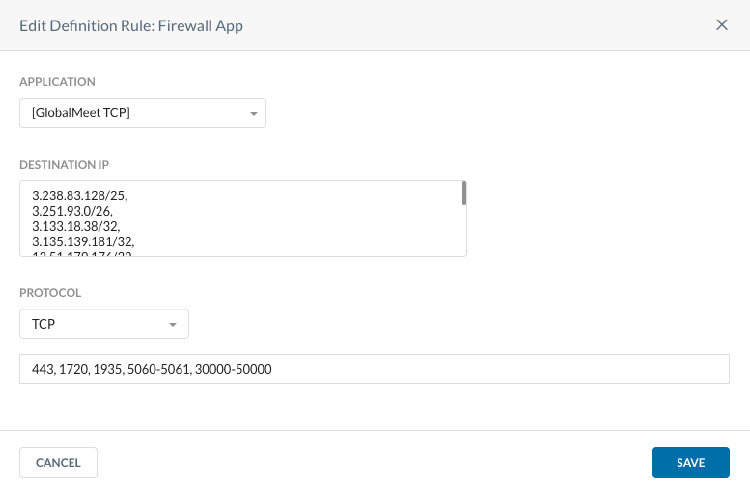
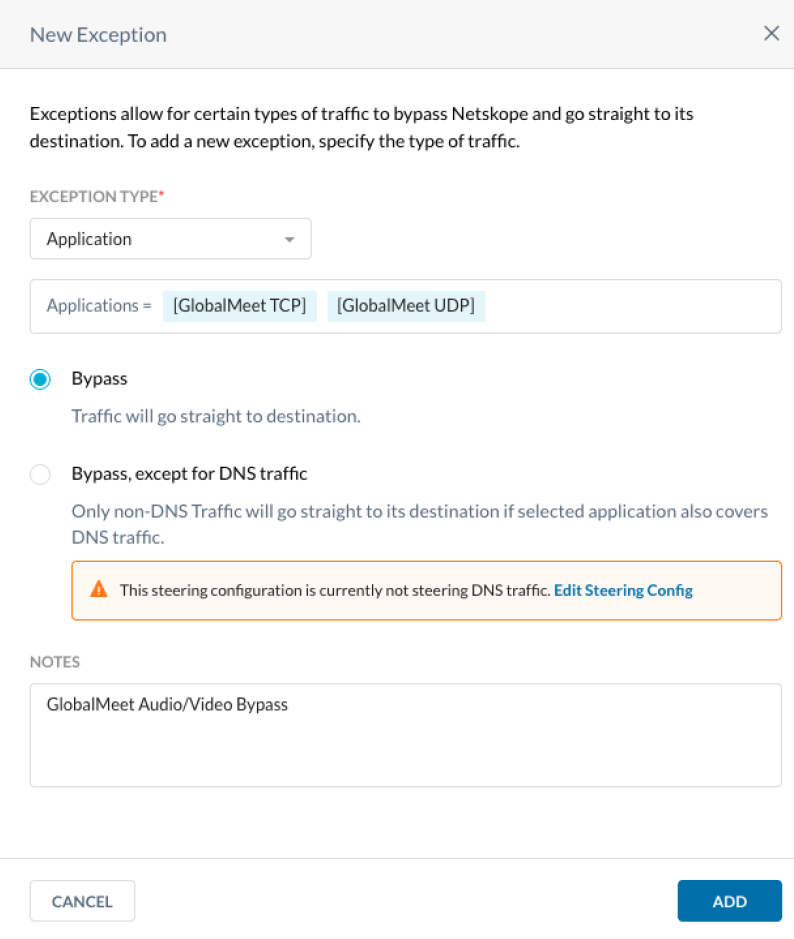
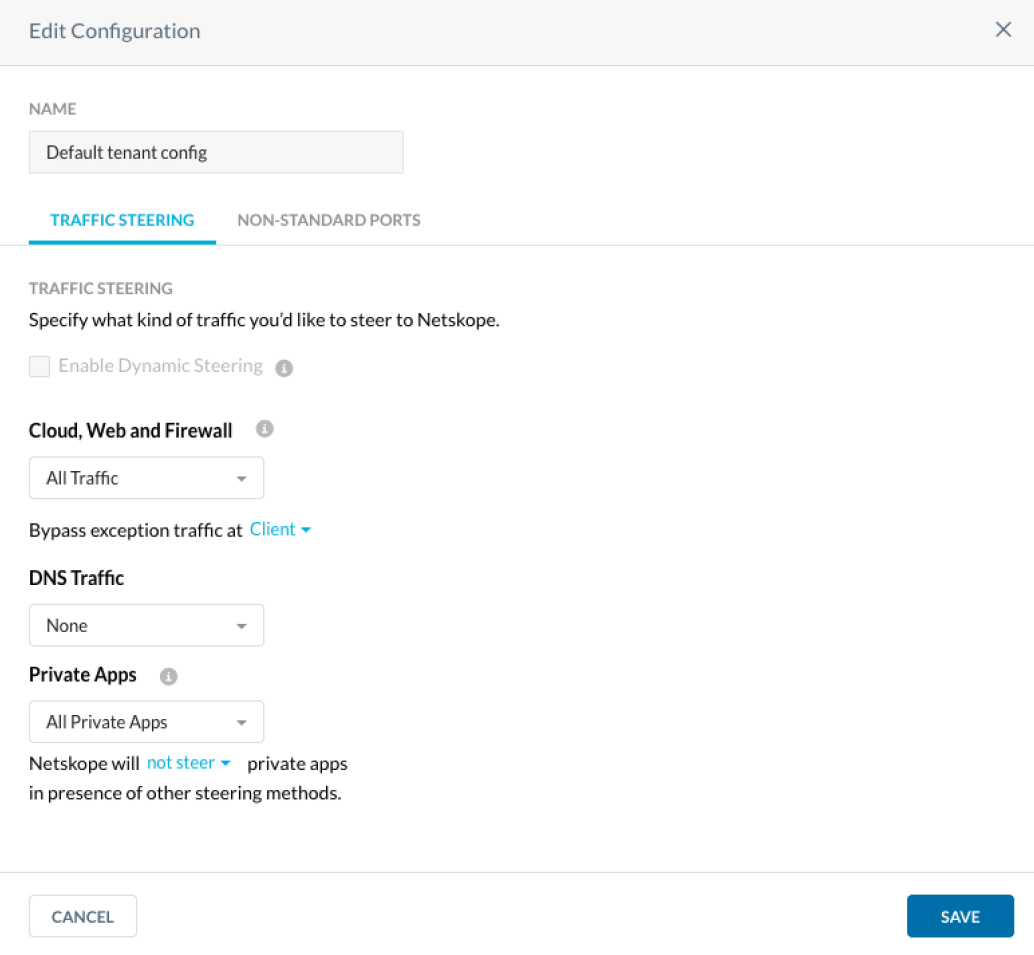
- Bypassing Netskope for improved performance
Ways to broadcast a Live event
We offer multiple ways to broadcast no matter the scale of your event, the venue, or the location of your presenters. When you schedule a Live event, you select how presenters will connect their audio and video to broadcast to the audience. The device or method is the live acquisition source for the event.
Note: This only determines how your presenters connect their audio and video and broadcast to the audience. All webcast events include visual elements such as headshots, slides, overlay videos, and more.
If presenters will speak to the audience but remain off-camera, select Telephone as the acquisition source. If they'll broadcast audio and video, you can use a single webcam, the video bridge for multiple webcams, an encoder, or a video conferencing unit (VCU).
Available options depend on your account settings. Contact your sales representative or Support to request additional broadcasting options.
Broadcast audio only
Select Telephone to broadcast the presenter audio with a telephone connection. Up to 20 presenters can stream their audio from a telephone or VoIP connection. Presenters dial in to the presenter bridge and a backup bridge is included as a backup audio source.
Broadcast audio and video
There are several options for connecting presenters and streaming their audio and video to the audience. They can connect directly using their own webcams or connect to another system or service first and then stream that source into the event.
- Webcam - A single webcam connection. Broadcast one presenter or several presenters using the same webcam. Before the event, you must install a driver on the computer you plan to use on the day of the event that lets the event connect to your webcam. Recommended if the event has only one presenter or one webcam source.
- Video Bridge - For multiple presenter video streams. Allow up to 20 presenters to connect their webcams and broadcast.
- Advanced Video Bridge - Allow presenters to broadcast from a video conferencing system, Skype for Business, or telephone audio.
- VCU (Video Conferencing Unit) - Recommended for conference rooms. Use your own video conferencing unit to provide the video feed for the presentation. Before the event, get the H.323 or SIP address for the VCU and ensure it accepts incoming connections. In the Live Studio, the advanced video bridge uses the address to call out to the VCU and bring it into the event.
- Your Encoder - Use your own RTMP-enabled encoding device to broadcast multiple webcams and microphones from your venue as a single stream.
Join the Live Studio
To moderate or present at a live event, enter the Live Studio and connect your audio or video. The Live Studio has controls for presenting slides, playing videos and other content, managing Q&A, and more.
The way you join the Live Studio depends on whether you have a webcasting account or whether you were invited to be a presenter or assist with Q&A.
Join as a moderator
If you have a webcasting account, sign in to the Webcast Admin portal and in the My Events list, click Edit to open the Live event. On the Event Summary tab, under Run My Event, click Launch Live Studio.
Join as a presenter
If you were invited to present at the event, you should have received an email with login details and a link to the Guest Admin Access site. Click the link and enter your information or credentials to sign in, and then click Live Presenter Studio.
Join as a Q&A manager
If you were invited to manage audience questions at the event, you should have received an email with login details and a link to the Guest Admin Access site. Click the link and enter your information or credentials to sign in, and then click Manage Live Q&A.
Add a virtual background to your Webcam event
The Webcast service does not currently offer virtual backgrounds for Webcam acquisition events. However, you can add them to your video stream with a third-party virtual webcam app. A virtual webcam app is software that allows you to add virtual backgrounds, filters, and more to your webcam video. After you install it, the virtual webcam displays as a new webcam source that you can select when joining the event.
Note: Virtual background are available for Video Bridge events. Refer to this help article for more information: https://help.webcasts.com/books/live-events/page/adding-virtual-backgrounds-on-the-video-bridge.
Supported virtual webcam apps include:
- CamTwist
- Chromacam
- Manycam
- OBS with Virtual Camera
- Snap Camera
- Xsplit VCam
Note: Download and test the app in the Live Studio at least 48 hours before the event starts. We do not provide support for third-party applications.
Change your background with a virtual webcam
Before joining the Live event, start the virtual webcam app and set up your virtual background.
Important: You must keep the virtual webcam running during the event for your virtual webcam to display properly.
To connect to the event with a virtual webcam:
- Join the Live Studio.
- In the Live Studio, a notification displays in the top left of the window that requires you to allow the Live Studio to access your computer's camera and microphone. Click Allow to grant permission.
- In the Broadcast Controls panel, click Preview.
- For your Video source, select your virtual webcam and then select the microphone you want to use for the broadcast. Check your webcam preview and audio levels to verify that they work properly
Note: This is only a preview. Your webcam is not visible to the audience or other presenters.
- Click Connect to connect your audio and video to the event. Once you're connected, other presenters can see your webcam.
Note: The connection can take up to two minutes to establish. If your stream fails to connect, click Cancel and then preview and connect it again.
Encoder stream bit rates
Adaptive Bit Rate (ABR) Encoder Events (Recommended)
You are only required to send one stream (per primary and backup). All streams are transcoded and aligned for soother quality transitions. If the system receives a higher stream than the bit rate listed in the 'Source Encoder Sends' section below, it will automatically transcode down to the bit rate shown in the 'Audience Receives' section. Sending a lower bit rate than those listed is not recommended.
The video player has a widescreen (16:9) aspect ratio with the following size options. Audio and video streams to attendees at the listed bit rates. We recommend using an audio bit rate of 96 kbps, which is included in the total bit rate. See 'System Requirements for encoder broacasts' for additional information.
Source Encoder Sends
| Video Player Size | Recommended Video Bit Rate | Recommended Audio Bit Rate | Total Bit Rate with Recommended Settings |
|---|---|---|---|
| 480p (854x480) | 800 kbps | 96 kbps | 896 kbps |
| 720p (1280x720) | 1700 kbps | 96 kbps | 1796 kbps |
| 1080p (1920x1080) | 3000 kbps (3mbps) | 96 kbps | 3096 kbps |
Audience Receives
| Video Player Size | Video Bit Rate | Audio Bit Rate | Total Bit Rate |
|---|---|---|---|
| Sending 480p (854x480) | |||
| Low - 270p (480x270) | 400 kbps | 96 kbps | 496 kbps |
| High - 480p (854x480) | 800 kbps | 96 kbps | 896 kbps |
| Sending 720p (1280x720) | |||
| Low - 270p (480x270) | 400 kbps | 96 kbps | 496 kbps |
| Medium - 480p (854x480) | 800 kbps | 96 kbps | 896 kbps |
| High - 720p (1280x720) | 1700 kbps | 96 kbps | 1796 kbps |
| Sending 1080p (1920x1080) | |||
| Low - 480p (854x480) | 800 kbps | 96 kbps | 896 kbps |
| Medium - 720p (1280x720) | 1700 kbps | 96 kbps | 1796 kbps |
| High - 1080p (1920x1080) | 3000 kbps (3mbps) | 96 kbps | 3096 kbps |
Constant Bit Rate (CBR) Encoder Events
You are only required to send one stream (per primary and backup). All streams are distributed at the bit rate set at the encoder. Listed below are the system-recommended settings for each player size.
Important: Streams that exceed 6 mbps (6,000 kbps) will have their connection terminated by the system. Please note that this includes both the audio and video bitrates together.
The video player has a widescreen (16:9) aspect ration with the following layout options. Audio and video streams to attendees at the provided bit rates. We recommend using an audio bit rate of 96 kbps, which is included in the total bit rate.
See 'System Requirements for encoder broacasts' for additional information.
| Video Player Size | Total Bit Rate |
|---|---|
| 480p (854x480) | 896 kbps |
| 720p (1280x720) | 1796 kbps |
| 1080p (1920x1080) | 3096 kbps |
The system will automatically transcode to the settings above for the on-demand archive, regardless of live bit rates used. With CBR events, you have the option to modify the streaming rate for a higher or lower live bit rate.
Important Note on all Encoder Events: Streams that exceed 6 mbps (6,000 kbps) will have their connection terminated by the system. Please note that this includes both the audio and video bitrates together.
How do I broadcast using an encoder?
To access the information needed to connect your encoder for the event, click the Media Encoder Settings button in the Broadcast Controls area of the Live Studio. Your encoding device (e.g. Wirecast) will need to be set up to send an RTMP stream for broadcast.
Click Media Encoder Settings to access the stream path(s), codec information and recommended stream settings.
Copy and paste the Primary Stream URL from the Encoder Settings to your encoding device settings. Then, copy and paste the Primary Stream ID into the stream setting of your encoder. Next, confirm that your encoding device is using the same settings as listed in the Encoder Settings. NOTE: Bit rate can be adjusted based on your requirements.
To add a redundant backup stream on the event, copy and paste the Backup Stream URL from the Encoder Settings to the secondary encoding device settings. Then, copy and paste the Backup Stream ID into the stream setting of your encoder. Next, confirm that your secondary encoding device is using the same settings as listed in the Encoder Settings. NOTE: Bit rate can be adjusted based on your requirements, but streams should never exceed 6 mbps (6,000 kbps) to avoid being terminated by the system.
Note: If you would like to use secure RTMPS streaming instead, the Primary Stream and Backup Stream URLs need to be updated. Refer to the sample links before for an example (bolded text reflects the changes).
- Standard RTMP URL Format: rtmp://ingest-us1.webcasts.com/abr_live/mp4:ABCDEFGHIJ
- Secure RTMPS URL Format: rtmps://ingest-us1.webcasts.com:443/abr_live/mp4:ABCDEFGHIJ
Start your encoder to begin streaming to the Webcast Server. Connected text will appear in the Primary Stream and/or Backup Stream boxes when a stream has been connected. Once your encoder confirms a successful connection, click the Preview Stream button to view the stream(s).
If you would like to preview the video stream(s) at full resolution, click Launch Full-size Preview to view the stream at full resolution.
The Primary Stream preview will load by default in the full-size preview window. Use the Source dropdown above to test the Backup and Audio Stream if applicable.
Once the connection process is complete and you see your video in the Live Studio, click Start Webcast to begin broadcasting your event.
To switch between the primary and backup streams during an event, click on the Primary Stream or Backup Stream box. The stream name highlighted in blue along the left will appear in the Broadcast Controls window and is active on the presentation.
Live stream bit rates
Presenter Video, Screen Share (video bridge), and Inline Videos
If you're broadcasting telephone audio only, the video player contains a 320 x 240 pixel space for headshots to be displayed and uses a 96 kbps stream.
If you're broadcasting audio and video, the video player has a widescreen (16:9) aspect ratio with the following layout options and streams to attendees at the listed bit rates. The audio bit rate is always 96 kbps and is included in the total bit rate.
480p (854 x 480)
- Webcam: 896 kbps (High) OR 296 kbps (Low)
- Encoder:
- 896 kbps / 496 kbps (Adaptive Bit Rate)
- 896 kbps (Constant Bit Rate)
- VCU: 896 kbps / 496 kbps (Adaptive Bit Rate)
- Video Bridge: 896 kbps / 496 kbps (Adaptive Bit Rate)
720p (1280 x 720)
- Webcam: 1796 kbps (High) OR 296 kbps (Low)
- Encoder:
- 1796 kbps / 896 kpbs / 496 kbps (Adaptive Bit Rate)
- 1796 kbps (Constant Bit Rate)
- VCU: 1796 kbps / 896 kpbs / 496 kbps (Adaptive Bit Rate)
- Video Bridge: 1796 kbps / 896 kpbs / 496 kbps (Adaptive Bit Rate)
1080p (1920 x 1080)*
- Webcam: 3096 kbps (High) OR 296 kbps (Low)
- Encoder:
- 3096 kbps / 1796 kbps / 896 kpbs / 496 kbps (Adaptive Bit Rate)
- 3096 kbps (Constant Bit Rate)
- VCU: 3096 kbps / 1796 kbps / 896 kpbs / 496 kbps (Adaptive Bit Rate)
- Video Bridge: 3096 kbps / 1796 kbps / 896 kpbs / 496 kbps (Adaptive Bit Rate)
*Note: 1080p and 720p access may not be available on all accounts. Please contact Support with questions.
Overlay Videos
The bit rate of overlay videos depends on the bit rate of the video when you uploaded it. If you uploaded a video:
- Below 800 kbps, the video will be transcoded at 800 kbps
- Between 800 to 1700 kbps, the video will be transcoded at the uploaded bit rate
- Over 1700 kbps, the video will be transcoded to 1700 kbps
Presenter Best Practices
Below are a list of best practices for presenters:
What should a presenter have available for the presentation?
It is recommended that all speakers prepare the following:
- For audio events, a telephone with a quality headset or handset for EACH presenter/presentation room.
- Speakerphones have poor sound quality and tend to pick up background noise. If you must use a speakerphone try putting something padding under the phone (things around the office such as legal pads or newspapers will do the trick) and make sure the phone is away from computer fans, projectors, and air conditioning units.
- Cellphones and cordless/wireless headsets or phones of any kind should be avoided as they are subject to disconnection and interference.
- For video events, an speaker that will be on video should have an internal or USB webcam.
- A quality headset is recommended as the audio source on video events. A webcam's internal microphone will work, but a headset will produce higher quality audio.
- A hard copy printout of your slides.
- Make sure you print out the same PPT file that has been uploaded. In case your computer or internet connection fails, you can reference your slides while someone else flips the slides for you without any interruption to your recording.
- A wired internet connection.
- Wireless can work, but we do not recommend it as the signal can be subject to drops and interference. Wireless internet should NOT be used for video events or screen sharing.
- It is recommended that you test your system briefly before joining the events pre-call.
- To further improve computer performance, it's recommended to restart your computer shortly before the event and close any unneeded programs or browser tabs.
- Log off of your VPN
- VPNs can reduce your available bandwidth, which is especially important when broadcasting video. We recommend logging off your VPN while presenting.
How can I test my system for presenting?
For any testing, you should use the computer and browser that you intend to present from. Two seemingly identical computers can have very different program and system configurations.
Once you have received the Guest Admin, please log into the webcast Live Studio to test your system.
- Click the thumbnails or the Next Slide button in the slide tool to flip slides. If your computer is working correctly, you should see the slides advance.
- There should be a Presenter Discussion box in the lower left corner of your screen. Type a message into the box provided and click Submit. If your computer is working correctly, you should see your message in the chat log.
If you will be using your webcam or screen sharing on an event, please test your system here: https://event.webcasts.com/test
Please note that if you run into any testing issues, you may be asked to provide a screen capture of the results of this system test.
What is the event start process?
To ensure a seamless start to your event, we recommend following the steps below:
- During pre-live procedures, streams are connected and previewed well before the event is set to start.
- Once an event is connected by the host and is in Stand By mode, recording will begin.
- The yellow Stand By indicator at the top of the Live Studio says REC and, upon hovering, shows the following message: "The server is connected and recording but any Audio or Video captured in 'Stand By' mode will NOT be broadcast to your audience or be made available in the automated event archive."
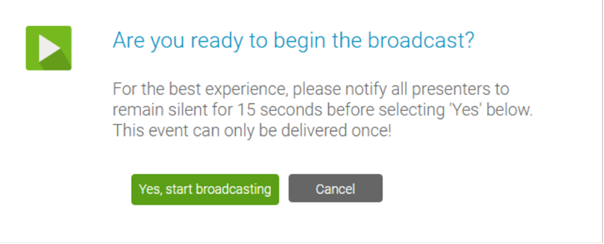
- The event host should instruct presenters to each silently count down from 15. At 0, the host will click Start Webcast (and then click Yes, start broadcasting in the confirmation message) to begin the presentation.
- Presenters can begin speaking once they see the On Air indicator at the top of the Live Studio turn green.
What if I have issues with the Webcast Live Studio during a live call?
The Live Studio checks the presenter's connection status approximately every three seconds. When the Live Studio detects a sustained connection drop (an approximate 10-15 sec. without a response from our servers), a message is displayed in the Live Studio alerting the presenter:
"Could not connect to the server. Please check your internet connection.(1)".
This message appears in an overlay and the presenter cannot click on any Live Studio elements while their connection is down. Once the connection has been reestablished, the message will disappear automatically and the presenter can resume their Live Studio interaction.
If the Live Studio becomes unresponsive without an internet connection failure:
- The presenter should first attempt to re-launch the Live Studio by closing the Live Studio browser window and clicking the "Launch Live Studio" button on the Guest Presenter page (or the Event Summary page for admins managing their own live events).
- If the presenter is unable to re-establish their internet connection or the Live Studio remains unresponsive after re-launching, the presenter may need to contact their IT team for assistance.
- If the presenter is unable to flip their slides for a sustained period of time, it is recommended to designate an individual (preferably a colleague familiar with the content) to assist with flipping slides for the webcast audience. The presenter should reference slide numbers from their print out copy of the slide deck as they speak to the material.
Share a video during a Live event
In the Live Studio, the Overlay Videos tab shows all uploaded videos. From here, you and other presenters can preview them, play them for the audience, and stop sharing them.
Notes:
- Before your event goes live, have a least one presenter preview each overlay video. This helps to cache the videos on the event servers (content delivery network or CDN) and provide faster delivery during your event.
- The stream is delayed for attendees, so you must allow the event to run for 15 seconds before sharing a video. This ensures all attendees see the video.
- Once you share a video, you can only share it again the way you played it the first time (overlay or inline). For example, if you shared a video as an overlay, you can't share it in the video player.
- All presenters are automatically muted while previewing and sharing a video.
- You can't share a video and screen share at the same time.
Jump to: Preview a video | Share a video as an overlay | Share a video in the video player (inline) | Stop sharing a video
Preview a video
Preview your overlay videos to make sure they display correctly to the audience during the live event. When you preview a video, the video is only visible to you.
To preview an overlay video:
- In the Live Studio, click the Overlay Videos tab.
Thumbnails of the uploaded videos are displayed with the video name, size, and duration.
- Under the video you want to test, click Preview.
The video plays in a new window as an overlay.
Note: The audio is muted when you preview a video. To test the video's audio, click Listen to Presentation Audio.
Share a video as an overlay
- In the Live Studio, click the Overlay Videos tab.
Thumbnails of the uploaded videos are displayed with the video name, size, and duration.
- Under the video you want to view, click Launch.
- A message displays asking if you want to send the video to the audience. Click OK.
The video is shared with the audience and plays in a new window as an overlay for you and other presenters. The video includes a progress bar to let you know when the video is done playing.
Note: Only the audience hears the video's audio. To prevent feedback, we recommend that presenters don't listen to the audio during the event.
Share a video in the video player (inline)
Notes:
- In the Live Studio, click the Overlay Videos tab.
Thumbnails of the uploaded videos are displayed with the video name, size, and duration.
- Under the video you want to view, click Launch Inline.
- A message displays asking if you want to send the video to the audience. Click OK.
The video plays for the audience in the video player and plays in a new window as an overlay for you and other presenters. The video includes a progress bar to let you know when the video is done playing.
Note: Only the audience hears the video's audio. To prevent feedback, we recommend that presenters don't listen to the audio during the event.
Stop sharing a video
While a video is being shared with the audience, you or another presenter can revoke it and stop it from playing.
Important: When a video is revoked, it is not included in the event replay.
To stop sharing a video:
- At the bottom of the video, click Revoke Video.
- A message displays asking if you want to revoke the video. Click OK.
Stream optimization
It is important for any webcasting professional to understand if their network is ready to support a webcast. While our webcasting platform consumes far less bandwidth than major web conferencing tools, it still requires a high-speed connection to the internet to assure a quality user experience. Since the Webcast platform can support video-enabled webcasts for up to 10,000 attendees or more, there is a greater need to ensure your network can handle the attendance capacity.
If your audience resides largely on a single corporate network, you may need to consult with the IT department to confirm there is adequate bandwidth to support your event. If adequate bandwidth is not available, you should consider leveraging one of the Webcast platform’s stream optimization solutions. These options include:
Adaptive bitrate streaming
Adaptive bitrate streaming works by detecting a user's bandwidth and adjusting the quality of the video stream accordingly. This allows your webcast viewers to receive streaming video at an appropriate bitrate for their bandwidth, ensuring a high-quality experience for all participants.
Benefits of adaptive bitrate streaming:
- Allows viewers with high-speed internet connections to receive a HD quality video stream.
- Viewers who do not have a high-speed internet connection, who may be on a public wifi connection or on a shared internet connection, will receive a lower bit-rate stream to ensure a buffering free video stream.
- Adaptive bitrate streaming is fully automated in the Webcast platform, making the process seamless for viewers.
Peer-to-peer (P2P) streaming
A P2P network optimizes video by enabling audience members to pull streams from other event participants on the same network. This method can reduce the amount of public IP bandwidth by up to 95%. A P2P solution requires a software client to be distributed to the global viewing audience by group policy or other installation method. The P2P software client is fully integrated with the webcast application and it automatically connects to, routes, and rebroadcasts video signals.
We partner with Hive Streaming in this space for P2P stream delivery.
Benefits of P2P streaming:
- Allows a high volume of viewers on the same corporate network to view HD video with minimal impact on the corporate internet connection.
- Once deployed the solution eliminates the need for the Network Engineering resources typically required to support video streaming using network appliances.
- P2P streaming is fully automated, making the process seamless for viewers.
Stream caching
Stream caching requires a minimum of two network appliances capable of intercepting, caching, and distributing video streams. This limits the amount of public IP bandwidth consumed by delivering streams from cache behind the firewall. While this method normally requires ongoing dedicated resources from an internal Network Engineering or Security team, once deployed the solution does not require any software to be distributed or maintained on end user machines.
The Webcast platform fully supports video optimization using any device capable of caching HTML5 (HLS) streams, such as Blue Coat ProxySG.
Benefits of stream caching:
- Significantly reduces the bandwidth utilized by webcast viewers.
- Stream caching with your webcast is seamless for viewers.
Change the event window layout during a live event
During a Live event, you can change the layout of the event window that the audience sees to feature different content. The available layouts depend on the type of broadcast (video or audio) and player size you selected in the event setup.
Note: Before the event begins, go to the Player & Branding tab, and under Player Layouts, select Enable Layout Switching. To learn more, see Enable layout switching for an event.
To change the event window layout:
- Join the Live Studio.
- In the Live Studio, click the Layouts tab.
- The available layouts are displayed and the name of the layout that is being shown to attendees is highlighted in green. To change the layout, click another one.
The layout is displayed to attendees.
Bypassing Zscaler proxies for improved performance
Zscaler is a cloud security platform that scans your data for threats. When Zscaler is installed on a presenter's computer, it will cause any Webcast audio and video data to be redirected through the Zscaler security cloud before it can reach the Webcast network. This may lead to video/audio connections being blocked completely or issues with call quality if the connection is completed.
Webcast connections are not sending any executable data, so there is not a need to scan it with Zscaler. We advise our customers to configure Zscaler to allow Webcast data to bypass to prevent potential issues. Please contact your IT department for assistance.
Please be sure to add the domain names, protocols / ports, and IP Ranges. This will allow your Presenter(s) to connect their webcam(s) through their current Chrome, Edge Chromium, or Firefox browser using WebRTC. It is critical that the IPs are allowed, and not just the domain wild cards, because the connection is established using the ICE protocol, which negotiates based on IP addresses.
More information about Zscaler bypasses can be found here: https://help.zscaler.com/z-app/best-practices-adding-bypasses-z-tunnel-2.0
A full list of Webcast network requirements, used to configure Zscaler, can be found at the link below. Refer to the "Webcast Presenter" columns in the Network Resources document when updating Zscaler. The Webcast Audience Member requirements do not need to be allowed in Zscaler.
Webcast Network Resources: https://webcasts.com/networkresources/
Video Bridge Events
These help articles will cover using the Video Bridge acquisition to deliver your live events.
Video Bridge Guide for Presenters and Guest Admins
A Video Bridge allows presenters to connect to an event and broadcast from different camera sources and locations. As a presenter, you will join the event from your computer and connect the video source that you'll use to speak to the audience. Often this is a webcam, but you can also broadcast and present from a video conferencing system, Skype for Business, or a telephone (where you're not on camera).
Use this guide to learn how to test your system and connect to the Video Bridge. This guide contains the following topics:
- System Requirements
- Test your System
- Connect to the Video Bridge
- Connect using Another Source
- Navigate the Video Bridge
- Event Start Process
System Requirements
All presenters and venues must meet the following minimum system requirements:
- Operating system - Windows 11, Windows 10, Windows 8.1+ Pro, macOS 10.14+
- Processor - Intel Core i5 3.0GHz or equivalent
- RAM - 4GB
- Internet connection - A dedicated and hardwired high-speed connection of 1.5 Mbps+ (upload and download). We do not recommend using a Wi-Fi connection since it is prone to dips in bandwidth that can negatively impact your video connection.
- Internet Browser - Chrome (latest version), Firefox (latest version), Microsoft Edge (latest version)
- Webcam - High quality or HD webcast (for example, Logitech C920)
- Microphone - Headset microphone or webcam mic with built-in noise-cancelling
Note: If you are using a microphone, use headphones or earbuds to prevent feedback from your computer speakers.
Before the event, presenters and venues must also:
- Plug in their computers. Do not run an event on battery power.
- Disconnect from the VPN.
Test your System Before the Event Starts
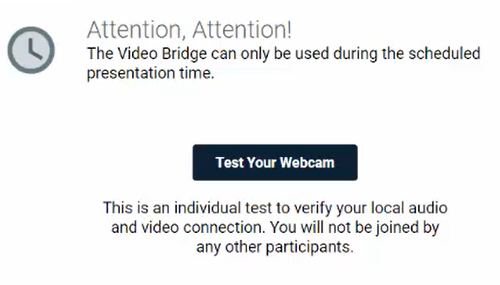
It's important that you make sure your system is compatible before the event begins to identify and resolve any issues. At least 48 hours before the event, join the Live Studio and run a diagnostic on your system with the network and equipment you plan to use on the day of the event. This checks the quality of your audio and video connections.
You should have received an email with login details and a link to the Guest Admin or Guest Presenter Access site. The Guest Admin site includes a button that lets you enter the Live Studio.
To test your webcam and microphone:
- Sign in to the Guest Admin site and click Live Presenter Studio.
- In the Live Studio, click Test your webcam.
- Enter your name and click Next.
- Select the Microphone, Camera, and Audio Output sources you will use during the event. Confirm that the microphone volume level and webcam preview work properly. Click Test your speakers to make sure you can hear the event audio during the event.
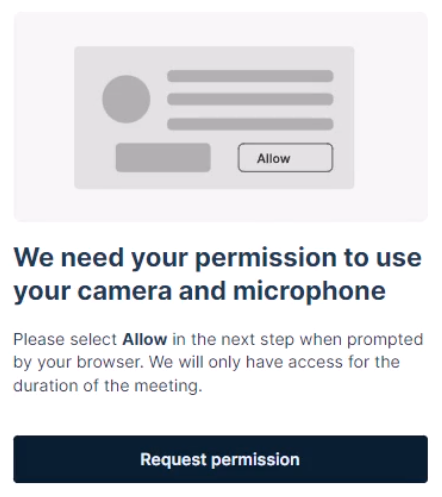
Note: If this is your first time connecting to the platform, you may be prompted to allow access to your camera and microphone before you can select your camera and microphone source. Click Request permission in the center of your screen if prompted.
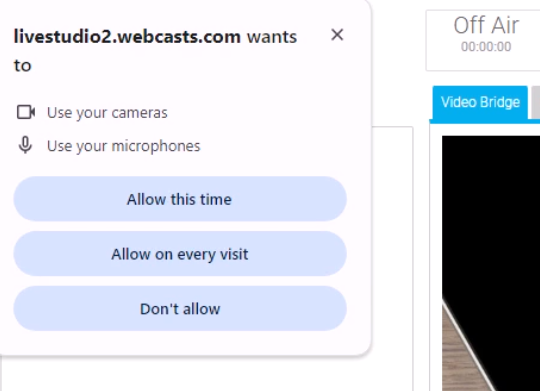
A pop-up in the top left will allow you to select what if you would like to allow access this time only or allow access for every visit.
- Click Join now and follow the guided connection test instructions.
The test records a short clip of your audio and video and plays it back to you. Make sure the video plays clearly, without feedback or echo. If it does not record correctly, there could be a network connection issue. Check that you have a wired (LAN) connection to the internet and that it is active.
If you have any issues, run the test again. If you continue to have issues, contact support or your event host.
Connect to the Video Bridge
To join the Video Bridge:
- Sign in to the Guest Admin site and click Live Presenter Studio.
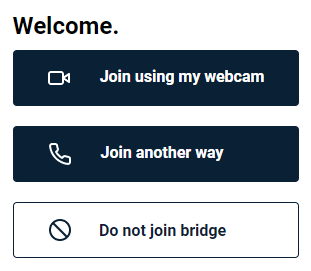
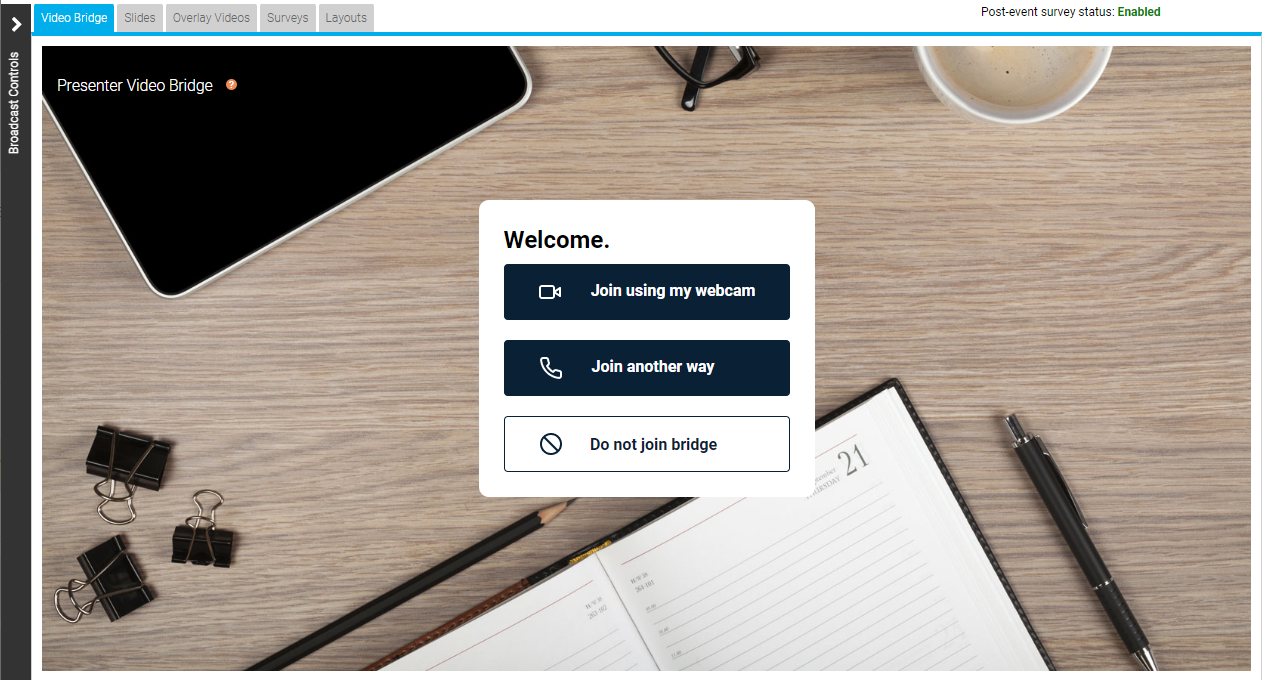
- Click Join using my webcam.
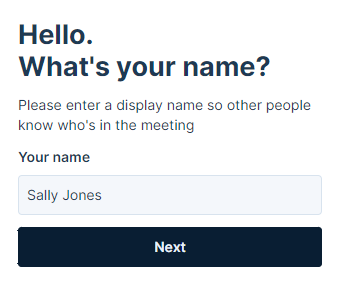
- Enter your name and click Next.
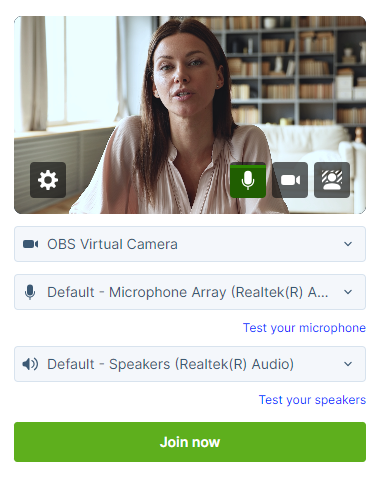
- Select the Microphone, Camera, and Audio Output sources you want to use for the broadcast using the available dropdowns. Confirm that webcam preview work properly and that your microphone audio is being registered on the microphone icon in the webcam preview window. Click Test your speakers to make sure you can hear the event audio during the event.
If you are a technical assistant or moderator who will not speak or appear on camera, use the microphone icon or camera icon in the lower right of the video preview to mute your microphone or turn off your webcam.
- In the lower right of the video preview, click on the person icon to add a blurred or virtual background to your video stream.
-
Click Join now.
Note: The Video Bridge utilizes UDP/TCP RTP Media Traffic over ports 4000-5000 to connect a webcam. If a presenter’s connection to the Video Bridge is blocked by their network, the system will automatically failover to use TCP 443 (HTTPS).
This failover is intended for presenters behind on a restricted network to ensure a connection can be made. However, TCP media is often subject to a noticeable delay and synchronization issues between audio and motion, as well as a delay on content share streams. It's always better to use a UDP/RTP connection whenever possible. For that reason, it is recommended that presenters disconnect from VPN before presenting. It is also recommended to test your system in advance to ensure there aren’t any issues connecting on the live event.
Connect to the Video Bridge using Another Source
If you are not able to connect to the Video Bridge, are experiencing issues with your audio/video stream on the Video Bridge due to a connection or network issue, or prefer to join from another source, the Video Bridge has additional connection options.
To join the Video Bridge:
- Sign in to the Guest Admin site and click Live Presenter Studio.
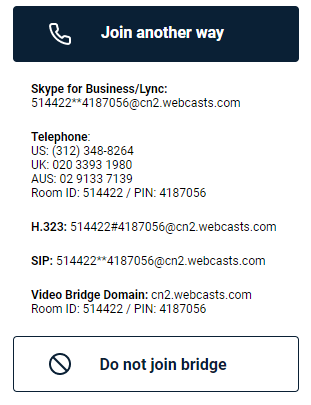
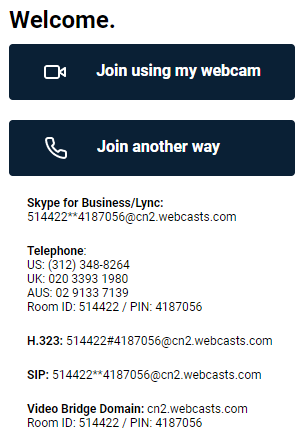
- Click Join another way.
- You will options to connect via Telephone, Skype for Business/Lync, or Video Conferencing Unit using H.323, SIP or a video Bridge Domain. Follow the instructions listed below to connect.
Navigate the Video Bridge
Live Studio Layout
Once connected to the Video Bridge, presenters will be able to see and communicate with other presenters on the Video Bridge. In addition to the Video Bridge, you may see tabs along the top of the Live Studio that provide access to Slides, Overlay Videos, Surveys and other content on your event. Please confirm with the Event Host your responsibilities during the presentation.
Once the event begins, you'll see "On Air" at the top of the window to confirm you are live to viewers. You can now speak, advance slides and use other controls for the event.
Video Bridge Controls
At the lower right of the Video Bridge window, each presenter has buttons to control their connection:
- Click on the microphone button to mute your audio.
- Click on the camera icon to hide your camera from displaying to viewers. These local controls can be toggled on/off during the event as needed.
Along the left side of the Video Bridge window, use the menu to access additional controls:
- Click on the people to access the Presenter List.
- Click on the up arrow icon to share your screen. Additionally details on screen sharing are included below.
- Click on the hand icon to raise your hand if you'd like to notify the event moderator or other speakers of your desire to talk.
- Click on the double arrow icon to launch the Video Bridge in full-screen view. Press Esc on your keyboard to exit full-screen view.
- Click on the speaker icon to mute the audio from Video Bridge.
Click on the gear icon in the top right to access advanced settings:
- Select Video and Sound to access controls to select or change your camera, microphone and audio playback sources. Enable "Voice Focused Noise Suppression" to suppress background noise on your connection. Enable "Prioritize Sharing Video" to prioritize motion over sharpness when sharing content with other participants. This is the best option when sharing video through screenshare as the motion will be smoother. When sharing static presentations or images, leave the option disabled to prioritize sharpness. Click Save to apply any changes to these settings.
- Select Quality to adjust your connection quality. This setting impacts the amount of bandwidth required by the presenter. It is set to Auto by default, so the quality will automatically adjust based on a presenter's connection, but it can be manually adjusted using the dropdown here.
- Select Media Statistics to see statistics on your connection. This will allow you to see the overall connection quality, along with details like packet transmission, packet loss and jitter. It is helpful to review these statistics if a presenter is having issues with their connection.
- Select Accessibility to always display Video Bridge controls. By default, controls will fade away after a few seconds of inactivity, but this setting will keep the controls displayed at all times.
- Select Download Log to download a log with details on your connection to the Video Bridge. If a presenter encounters issues with their Video Bridge connection, it's recommended to download the log here before exiting the Live Studio. The Video Bridge log will be helpful to investigate any issues encountered.
Bridge Indicators
Small indicators display at the top center of the Video Bridge view in Live Studio to show important details about your presenters. These indicators are not broadcast to your audience.
- Presenter count: Total number of presenters when there are more than can be shown in the current layout
- Phone participants: Number of presenters connected by phone
- Muted cameras: Number of presenters with video off
- Raised hands: Number of presenters with a raised hand
Screensharing
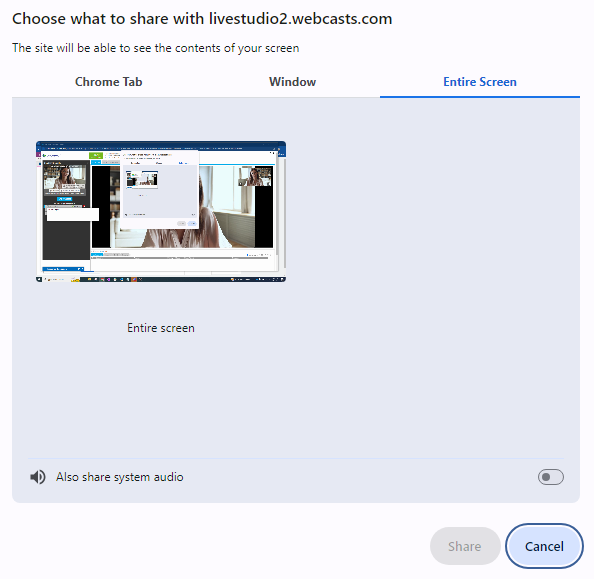
When sharing your screen, a pop-up window will appear allowing you to select what content you want to share. Select one of the tabs along the top: a Chrome Tab, Window (or application), or your Entire Screen.
Under the selected tab, choose one of the available options and click Share to make your screen share active to viewers.
Note: When sharing your Entire Screen or a Chrome Tab, use the "Also share system audio" toggle share your computer's audio along with your screen.
Once active, viewers will see the selected screen share application, a small window in the top right with the camera for the presenter sharing their screen, and a shared audio feed from the video bridge. Presenters should minimize their Live Studio and begin their screen share. Once complete, click Stop Sharing to end the screen share.
Event Start Process
To ensure a seamless start to your event, we recommend following the steps below:
- During pre-live procedures, streams are connected and previewed well before the event is set to start.
- Once an event is connected by the host and is in Stand By mode, recording will begin.
- The yellow Stand By indicator at the top of the Live Studio says REC and, upon hovering, shows the following message: "The server is connected and recording but any Audio or Video captured in 'Stand By' mode will NOT be broadcast to your audience or be made available in the automated event archive."
- The event host should instruct presenters to each silently count down from 15. At 0, the host will click Start Webcast (and then click Yes, start broadcasting in the confirmation message) to begin the presentation.
- Presenters can begin speaking once they see the On Air indicator at the top of the Live Studio turn green.
Video Bridge Overview (Moderators)
| Number |
Feature |
Description |
||||||||||||||||||
| 1 | Live Studio Tabs |
Controls for different aspects of the event are grouped into tabs. Click the Video Bridge tab to manage your own webcam and audio, select a layout, and to manage presenter webcams and audio. Controls for Slides, Surveys, Overlay Videos, and other content you uploaded to the event are displayed in their own tabs next to the Video Bridge tab. |
||||||||||||||||||
| 2 |
Video Bridge Controls |
Select from the available options to access controls:
|
||||||||||||||||||
| 3 | Presenter Options |
Next to each presenter connection, you may see the following icons:
Below the Presenter list, after the streams for the Video Bridge have been connected in the Broadcast Controls, you will see a Primary Stream and Backup Stream listed. Click on the settings button next to a stream to access additional controls.
|
||||||||||||||||||
| 4 | Local Presenter Controls |
Presenters can use the available options to control their connection to the Video Bridge. Available options:
|
||||||||||||||||||
| 5 | Active Speaker(s) |
The webcam of the presenter(s) will appear here. The number of speaker and layout of be determined by the layout selected by the Administrator. For more details on adjusting the layout of the Video Bridge, review this article: About Presenter Layouts Voice-activated camera switching is used to highlight the webcam of the presenter who is speaking (and recent speakers when using multiple frame layouts). To choose whose webcams are on stage, review this article: Spotlight Presenter Webcams on the Video Bridge |
||||||||||||||||||
| 6 | Your Camera View | A live view of your webcam. Hover over the window to access a button in the top right of the window to hide your self-view. Click and drag this window to another location on the Video Bridge to change where it appears locally. | ||||||||||||||||||
| 7 | Advanced Settings |
Click on the gear icon to access the advanced settings menu. Available options:
|
||||||||||||||||||
| 8 | Bridge Indicators |
Small indicators display at the top center of the Video Bridge view in Live Studio to show important details about your presenters. These indicators are not broadcast to your audience. |
||||||||||||||||||
| 9 | Broadcast Controls |
Controls to connect the Video Bridge and start/end the event. Access the Broadcast Controls using the > icon access the options to manage the event. For instructions on connecting a Video Bridge and starting/ending the event, review this article: How do I broadcast using the Video Bridge? |
||||||||||||||||||
| 10 | Manage Q&A |
Use the Manage Q&A section to manage the Q&A on the event. For additional information on Q&A, review this article: About Q&A |
||||||||||||||||||
| 11 | Presenter Discussion | Use the Presenter Discussion to have a private chat with presenters before and during the event. |
How do I connect and broadcast using the Video Bridge?
Once presenters have joined the Video Bridge and you are ready to start your event, use the Broadcast Controls section to connect and start your event. In the top left of the Live Studio, click on the > icon next to the Broadcast Controls text to access the controls.
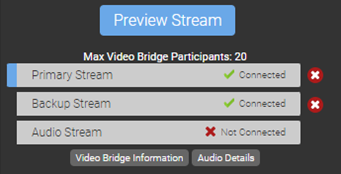
Click on the green arrow icons next to the Primary Stream and Backup Stream to connect the Video Bridge for delivery.
During pre-live procedures, streams should be connected and previewed well before the event is set to start. You will see Connected text to confirm when the Video Bridge has been connected. Click Preview Stream to preview the Video Bridge and prepare to start your event.
A preview of the Video Bridge stream will load in the Broadcast Controls window above. Once an event is connected by the host and is in Stand By mode, recording will begin.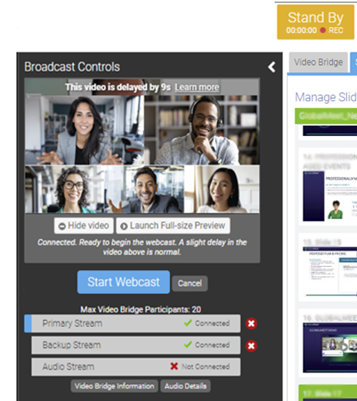
The yellow Stand By indicator at the top of the Live Studio says REC and, upon hovering, shows the following message: "The server is connected and recording but any Audio or Video captured in 'Stand By' mode will NOT be broadcast to your audience or be made available in the automated event archive."
The event host should instruct presenters to each silently count down from 15. At 0, the host will click Start Webcast (and then click Yes, start broadcasting in the confirmation message) to begin the presentation.
Presenters can begin speaking once they see the On Air indicator at the top of the Live Studio turn green. Below the On Air text, a timer will display how long you have been live to viewers.

Once the event concludes, click End Webcast below the Broadcast Controls window to end the presentation.
About Presenter Webcam Layouts on the Video Bridge
On the video bridge, you can choose how you want to arrange presenter webcams and which presenters to display to the audience during the Live event. This article introduces instructions on how to access Layout, the available Layout options, and details on how to spotlight an individual presenter and how you hide presenters from appearing to the audience.
Important: To see the video bridge and interact with other presenters, you must join with a webcam. Presenters who select I will not be appearing on camera won't be able to see or hear presenters who have joined the video bridge.
This guide contains the following topics:
- Presenter Webcam Layouts
- How the Video Bridge Fills the Stage
- Voice-Activated Camera Switching
- Prioritizing Presenters on Stage
- Hiding Presenters on Stage
Presenter Webcam Layouts
Presenter webcam layouts control the number of presenters on stage and how their webcams are arranged. By default, the event shows one presenter - Individual layout. You can change this layout before the event begins and at any time during the Live event. To access Layouts, click on the gear icon in the top right of the Video Bridge and select the Meeting Layout text.
Select from the available layouts by clicking on the thumbnail.
Layout options include:
- Adaptive: Displays up to 12 presenters in a dynamic layout feature different size frames. This layout uses AI to automatic adjust the layout and camera views based on speaking order, speaker engagement and microphone muting.
- Filmstrip: Displays up to 8 speakers with one large frame or up to 20 speakers in two different layouts, allowing for one or two large frames. Additional presenters appear in a filmstrip below the large frames.
- Grid: Displays up to 3, 4, 9, 16, or 20 presenters in equally-sized frames.
- Individual: Displays one presenter at a time. This is the default layout.
- 1:1: Display one presenter in a full screen view with another presenter in a smaller picture-in-picture frame.
- Duo: Displays 2 presenters side-by-side.
- Speaker: Displays 10, 13, or 20 presenters in a variety of layout option combining large and small frame
Select on a layout option and click Save to enable it on your event.
How the Video Bridge Fills the Stage
The frames in the layout are initially filled in the order that presenters join with a webcam. The number of available spots on stage depends on your selected layout. The Video Bridge doesn't set aside empty frames; instead it adds frames as needed, for each presenter.
Note: If a presenter joins with a webcam and then turns off their webcam, they will be hidden from display in the selected layout.
- By default, the Individual webcam layout is selected and the first presenter who joined is displayed on stage.
- In Grid layouts, frames are filled from left to right, one row at a time. Once a row is filled, a new row starts below the previous one. The first presenter to join with a webcam is in the top left frame.
- In Filmstrip layouts, the first one (or two) presenters who joined are displayed in the large frames, and remaining presenters fill the filmstrip from left to right, in the order they joined. Like grids, a new row starts once the first row is filled. The filmstrip has seven frames per row. The 20-presenter filmstrip has three available rows.
- In Speaker layouts, the first one (or two) presenters who joined are displayed in the large frames, and remaining presenters fill from left to right, one row at a time.
- In Adaptive layout, the first two presenters who joined are displayed in the large frames, the next three presenters will appear in medium size frames, and the remaining presenters appear in small frames.
- In Duo layout, the first two presenters who joined are displayed in the frames.
That's the initial order. Now let's look at voice-activated camera switching.
Voice-Activated Camera Switching
Voice-activated camera switching tracks when presenters speak and keeps a history of most to least-recent speakers. It uses this information to adjust who is on stage and makes sure the active talker is visible. This varies depending on the webcam layout you select.
When there are more presenters than spots available, other presenters remain off-stage until they speak. Then, voice-activated camera switching moves them to the stage, bumping another presenter off.
- In the Individual layout, the active talker replaces the presenter that spoke previously.
- In Grid layouts, presenters remain in their own frames while speaking. If an off-stage presenter speaks, that presenter moves to the grid, replacing the presenter who spoke least recently, no matter where they are in the grid.
- In Filmstrip layouts, the active talker is displayed in a large frame above the filmstrip. In the two-frame layout, the large frames show the active talker and the presenter who spoke immediately before. The filmstrip shows a history of presenters who have spoken, left to right from most to least recently.
- In Speaker layouts, the active talker is displayed in a large frame. In the two-frame layout, the large frames show the active talker and the presenter who spoke immediately before. The additional frames shows a history of presenters who have spoken, left to right from most to least recently.
- In the Adaptive layout, the large frames show the active talker and the presenter who spoke immediately before. The additional frames shows a history of presenters who have spoken, top-to-bottom and left-to-right from most to least recently.
- In the Duo layout, the frames show the active talker and the presenter who spoke immediately before.
When a person in the filmstrip or speaker layouts speaks, they move to a large frame and the person previously in that frame moves to the first spot in the filmstrip, shifting other presenters to the right. In the two-frame layout, the presenter in the large frame who spoke less recently is replaced.
Prioritizing Presenters on Stage
The Spotlight feature can be used to pin a presenter as the primary video in a layout, whether they are speaking or not. To spotlight a speaker, click on the star icon next to the presenter in the Presenter list.
When a presenter is spotlighted, the star icon next to their name will be highlighted. Click on this icon to remove the spotlight.
Multiple presenters can be spotlighted if required. This can be used for layouts featuring two (or more) large frames. Spotlighted speakers will appear in the order the Spotlight was added.
Hiding Presenters on Stage
If you want to hide a presenter from appearing in the video stream, their camera needs to be disabled. Presenters can hide their camera locally using the camera icon along the bottom of the Video Bridge.
Administrators can also hide any presenter's camera themselves. Click on the camera icon next to the presenter in the Presenter List.
When a presenter's camera is muted, the camera icon next to their name will be highlighted. Click on this icon to unmute their video.
Note: An administrator's mute/unmute camera controls operate independently from a presenter's local controls. If a presenter mutes their camera locally, an administrator can't unmute them and vice versa.
Change the Presenter Webcam Layout on the Video Bridge
Change the webcam layout to display more presenters during the Live event. By default, the Individual layout is selected and displays the active talker to the audience. You can change this layout before the event begins and switch layouts any time during the Live event. To learn more about presenter webcam layouts, see About Presenter Webcam Layouts.
Voice-activated camera switching is used to displays the active speaker (and recent speakers when using the Grid or Filmstrip layout). To display specific presenter webcams to the audience, see Spotlight Presenter Webcams on the Video Bridge.
Note: Only Hosts can change the presenter Video Bridge layout. To allow a presenter to change the layout, promote them to the Host role using the settings next to a speaker in the Presenter list.
To change the presenter Video Bridge layout:
- To access layouts, click on the gear icon in the top right of the Video Bridge and select the Meeting Layout text.
- Select from the available layouts by clicking on the thumbnail.
Layout options include:
- Adaptive: Displays up to 12 presenters in a dynamic layout feature different size frames. This layout uses AI to automatic adjust the layout and camera views based on speaking order, speaker engagement and microphone muting.
- Filmstrip: Displays up to 8 speakers with one large frame or up to 20 speakers in two different layouts, allowing for one or two large frames. Additional presenters appear in a filmstrip below the large frames.
- Grid: Displays up to 3, 4, 9, 16, or 20 presenters in equally-sized frames.
- Individual: Displays one presenter at a time. This is the default layout.
- 1:1: Display one presenter in a full screen view with another presenter in a smaller picture-in-picture frame.
- Duo: Displays 2 presenters side-by-side.
- Speaker: Displays 10, 13, or 20 presenters in a variety of layout option combining large and small frame
- Select on a layout option and click Save to enable it on your event.
Adding Virtual Backgrounds on the Video Bridge
Virtual and blurred background are available to presenters connecting their webcam to the Video Bridge. Virtual backgrounds can be added before joining the Video Bridge or after connected to the Video Bridge. Follow the instructions below to include a virtual background on your video: This article also includes best practices for virtual backgrounds.
Adding a Background Before Joining the Video Bridge
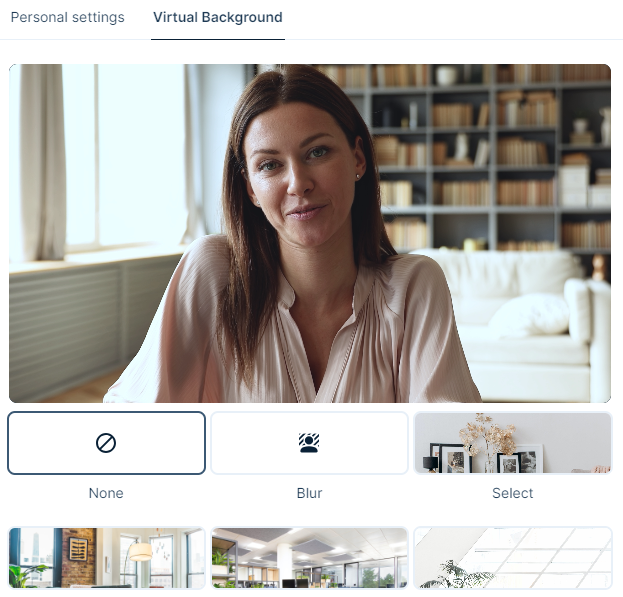
Before you join the Video Bridge, a virtual background can be selected. Along the bottom of the video preview, click on the person icon to add a blurred or virtual background to your video stream.
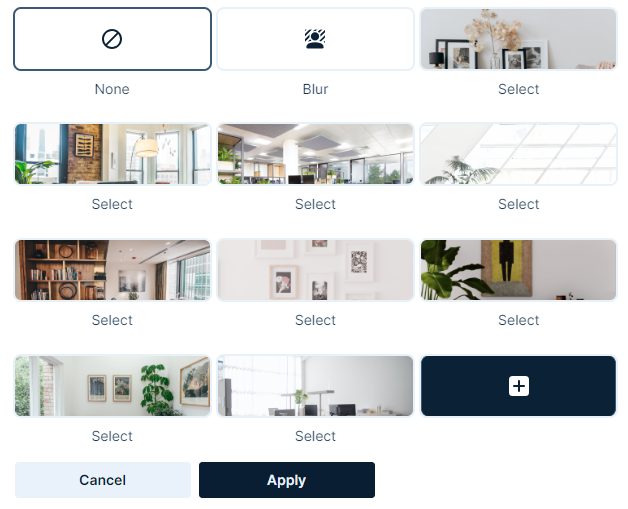
In the pop-up window, you will see a preview of your video stream and a list of available options below. Select:
- None to use your existing background.
- Blur to use a blurred background.
- One of the available virtual background images.
- The + icon to upload an image to be used as a custom virtual background.
Click Apply to add the selected background to your video stream. Click Cancel to discard changes and use your current background.
Changing Backgrounds When Connected to the Video Bridge
After you join the Video Bridge, you will be able to manage your background at any time throughout the event. In the self-preview window in the top right of the Video Bridge, click on the person icon to add a blurred or virtual background to your video stream.
In the pop-up window, you will see a preview of your video stream and a list of available options below. Select:
- None to use your existing background.
- Blur to use a blurred background.
- One of the available virtual background images.
- The + icon to upload an image to be used as a custom virtual background.
Click Apply to add the selected background to your video stream. Click Cancel to discard changes and use your current background.
Virtual Background Best Practices
Virtual Backgrounds require significant local processing, which could affect the performance of your machine. If there are noticeable audio or video quality issues while using Video Bridge, try disabling the Virtual Background effect. Below are best practices for using virtual backgrounds. Following these guidelines will produce the best quality video:
Setup
- Use good lighting to ensure you and your background are clear and well lit.
- Use a solid-colored background (screen, wall or curtain) or simple background (no art, shelves or objects).
- If available, use a green screen or blue screen for the best results.
- Wear clothing that contrasts with your background. High contrast will make it easier to distinguish you and from your background.
- Use a wired ethernet connection (rather than wifi) for the fastest and most stable connection.
- Restart your computer before the event and close any unneeded programs and applications to optimize your computer's performance.
Video Bridge Layouts
- Using a virtual background will decrease the presenter's video resolution to maintain smooth frame rates across varying types of connections.
- When displayed full screen for high resolution events (720p+), you may see an impact to the quality of their video quality. If so, it is recommended to display these presenters in a multi-camera layout for the best results.
Custom Background Images
For custom virtual background images, we recommend images using the following minimum specs:
- Resolution: 1920x1080
- File Type: JPG
- File Size: 1 MB
Troubleshooting
If the virtual background option does not appear, this is may due to a browser setting. Please enable your browser's hardware acceleration, which allows for smoother browsing, audio/video streaming, and overall experience.
- For Chrome: Visit Menu > Settings > System and ensure the Use graphic acceleration when available is enabled. Restart your browser and rejoin the Live Studio.
- For Edge: Visit Menu > Settings > System and performance and ensure the Use graphic acceleration when available is enabled. Restart your browser and rejoin the Live Studio.
Spotlight Presenter Webcams on the Video Bridge
Voice-activated camera switching is used by default to control which cameras appear to the audience.
The Spotlight feature can be used to pin a presenter as the primary video in a layout, whether they are speaking or not. To spotlight a speaker, click on the star icon next to the presenter in the Presenter list.
When a presenter is spotlighted, the star icon next to their name will be highlighted. Click on this icon to remove the spotlight.
Multiple presenters can be spotlighted if required. This can be used for layouts featuring two (or more) large frames. Spotlighted speakers will appear in the order the Spotlight was added.
To learn more, see About Presenter Webcam Layouts.
Hiding Presenters from Appearing on the Video Bridge
If you want to hide a presenter from appearing in the video stream, their webcam needs to be disabled. If a presenter's camera is disabled, their video will not be visible and they will not appear in the selected layout.
Presenters can hide their camera locally using the camera icon in the lower right of the Video Bridge.
Administrators can also hide any presenter's camera themselves. Click on the camera icon next to the presenter in the Presenter List.
When a presenter's camera is muted, the camera icon next to their name will be highlighted. Click on this icon to unmute their video.
Note: An administrator's mute/unmute camera controls operate independently from a presenter's local controls. If a presenter mutes their camera locally, an administrator can't unmute them and vice versa.
Video Bridge Integrations - Zoom
The Webcast platform allows for external video streams to be connected to the Video Bridge. This article will cover instructions on incorporating a Zoom meeting to your Video Bridge event. Topics include:
When to Integrate Zoom
In order to ensure the success of your Zoom-connected webcast, these are our recommended integration setups. Setups outside the recommendations can cause connection bottlenecks, video source control issues, and feature confusion. We have no ability to control your Zoom account.
Video-Only Broadcasting
If you need to take your regular Zoom meeting setup and push it out to a large video audience, without the use of any player features, The Webcast allows you to scale up quickly to thousands of online attendees.
Dedicated Panel Discussion
During a long presentation, if you have a series of panelists who need to be brought in mid-event, using a 3rd party tool like Zoom provides you the ability to mute these speakers on our Video Bridge until their portion of the presentation begins.
Connecting to Zoom
Dialing Out to Zoom
When you join the Live Studio for the event, the Video Bridge tab will appear by default. Regardless of if all of your presenters will be connecting through Zoom, the event host needs click Join using my webcam. This allows you to initiate the Video Bridge, access to the advanced Video Bridge controls, and the ability to connect/start/end the event.
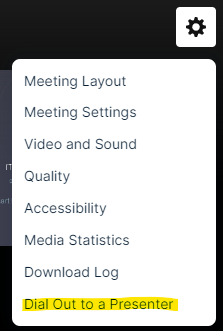
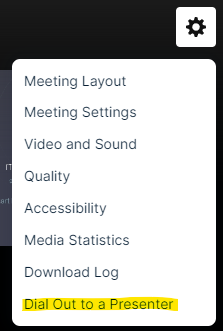
Once you have connected your webcam, click on the gear icon in the top right of the Video Bridge. Then, select Dial Out to a Presenter.
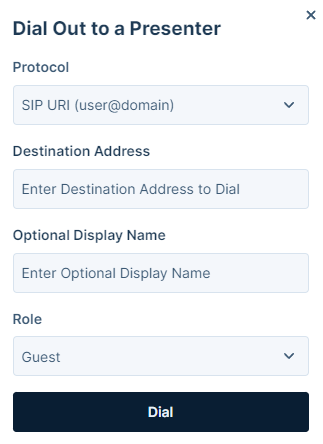
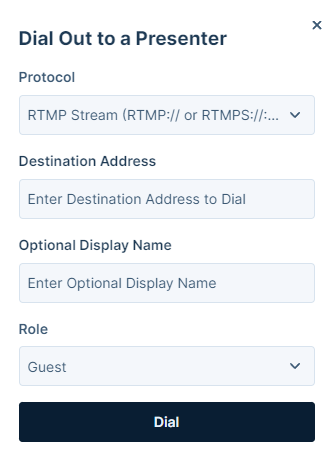
A pop-up window will appear where you can connect to the Zoom room. For Protocol, select "SIP URI". In the Destination Address field, enter the Zoom room address. The default SIP address format for a Zoom room is “[Meeting ID]@zoomcrc.com". To access instructions on the Zoom Conference Room Connector, visit: https://support.zoom.com/hc/en/article?id=zm_kb&sysparm_article=KB0060661
Dialing In From Zoom
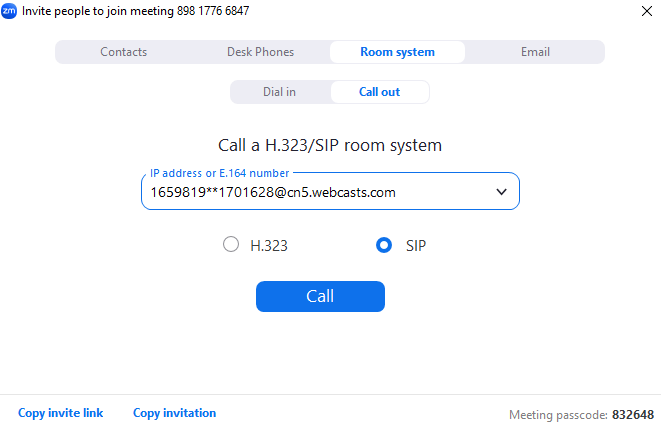
Alternatively, you can invite the Video Bridge into the Zoom room by having Zoom dial out. Select Invite and then select Invite a Room System.
In the pop-up window, enter the SIP address of the Video Bridge, which is available in the Connect using another source section of the Live Studio when you first join the Video Bridge.
When incorporating a Zoom room into a Video Bridge event, the Video Bridge will display the Zoom room as it is currently configured. Adjustments to the display of the Zoom room can be included when connecting the Zoom room to the Video Bridge.
By default, Zoom will include badging (logos). There are two methods for removing this from the Zoom feed. Please refer to the example below:
- Example Meeting Information
- Meeting ID: 123 4567 8910
- Passcode: 333333
- Host Key: 180772
- Example Dial Formatting
- If no Passcode is required, dial: 12345678910..606@zoomcrc.com
- If the Passcode is required, dial: 12345678910.333333.606@zoomcrc.com. Then, enter the Host Key when prompted.
The code “606” at the end of the address tells the Zoom connector to hide any overlays. For more information, visit: https://support.zoom.com/hc/en/article?id=zm_kb&sysparm_article=KB0065727.
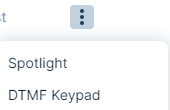
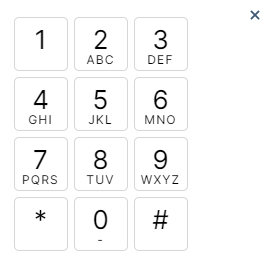
Additional changes to the video controls for the H.323/SIP Room Connector may be done using the Keypad option, which is available by hovering next to a speaker in the Video Bridge participant list and clicking on the settings button. In the settings menu, click DTMF Keypad to open the Keypad option.
Press “1” and Zoom controls will appear on the Video Bridge screen. To access instructions on Zoom dial commands, visit: https://support.zoom.com/hc/en/article?id=zm_kb&sysparm_article=KB0065727#h_01EX5JRNZFZSNNESK5E814QZBV.
Notes:
- Zoom requires the H.323/SIP Room Connector in order to connect to Video Bridge.
- Please contact Zoom Support for additional assistance with Zoom controls.
Screen Sharing Through Zoom
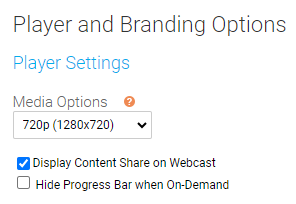
Note: If this setting is changed after the streams are connected in the Live Studio, the streams will need to be disconnected and reconnected using the Live Studio controls.
Zoom Connection Requirements
In order to connect to Zoom, you need the following in advance of the webcast:
- Confirmation that your Zoom Account has the SIP/H.323 Conference Room Connector (CRC) enabled.
- Zoom sells access to the CRC by simultaneous connections, so ensure that you have an available connection for your account for your live event, including 60 minutes of pre-event testing.
- The Meeting ID, and the password to the meeting (if applicable). Depending on your security settings, you may need to admit the Webcast into the room.
- Do not mute the connection to the Video Bridge.
- Provide the connection with full “Presenter” rights, do not add as an attendee.
- Zoom’s RTMP-based Live Streaming Service is not supported by the Webcast platform.
Help Video - Testing a Video Bridge Connection
With the Video Bridge, you can broadcast your video stream from a webcam, video conferencing system (SIP/H.323), on-site encoder (RTMP), or meeting apps such as Skype for Business.
In this video, you will learn how to test your camera and microphone connection to the Video Bridge. It's recommended to test at least 48 hours in advance using the same computer and network that you plan to use for the live event.
Help Video - Video Bridge Training for Guest Speakers
With the Video Bridge, you can broadcast your video stream from a webcam, video conferencing system (SIP/H.323), on-site encoder (RTMP), or meeting apps such as Skype for Business. In this video, Guest Presenters will learn how to connect and share their camera and microphone on the Video Bridge.
Event Start Procedure
To ensure a seamless start to your event, we recommend following the steps below:
- During pre-live procedures, streams are connected and previewed well before the event is set to start.
- Once an event is connected by the host and is in Stand By mode, recording will begin.
- The yellow Stand By indicator at the top of the Live Studio says REC and, upon hovering, shows the following message: "The server is connected and recording but any Audio or Video captured in 'Stand By' mode will NOT be broadcast to your audience or be made available in the automated event archive."
- The event host should instruct presenters to each silently count down from 15. At 0, the host will click Start Webcast (and then click Yes, start broadcasting in the confirmation message) to begin the presentation.
- Presenters can begin speaking once they see the On Air indicator at the top of the Live Studio turn green.
Help Video - Video Bridge Training for Administrators/Hosts
With the Video Bridge, you can broadcast your video stream from a webcam, video conferencing system (SIP/H.323), on-site encoder (RTMP), or meeting apps such as Skype for Business. In this video, Admins/Hosts will learn how to connect your video source, manage other presenters, and deliver a Video Bridge event to your audience.
Event Start Procedure
To ensure a seamless start to your event, we recommend following the steps below:
- During pre-live procedures, streams are connected and previewed well before the event is set to start.
- Once an event is connected by the host and is in Stand By mode, recording will begin.
- The yellow Stand By indicator at the top of the Live Studio says REC and, upon hovering, shows the following message: "The server is connected and recording but any Audio or Video captured in 'Stand By' mode will NOT be broadcast to your audience or be made available in the automated event archive."
- The event host should instruct presenters to each silently count down from 15. At 0, the host will click Start Webcast (and then click Yes, start broadcasting in the confirmation message) to begin the presentation.
- Presenters can begin speaking once they see the On Air indicator at the top of the Live Studio turn green.
Video Bridge Tab Mini-View
On a Video Bridge event, when you navigate to another tab in the Live Studio (other than the Video Bridge tab), you will see a mini-view of the Video Bridge. This window is designed to allow you to preview the video at any time and quickly access the Video Bridge controls if need.
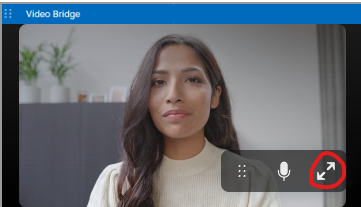
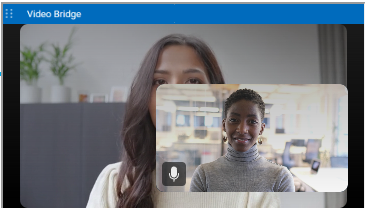
The min-view window is a fixed size and will display in the upper right of your screen by default. Click on the Video Bridge bar to minimize the mini-view window to allow easier access to the Live Studio. Click and drag the mini-view window if you would like to move the window to another location in the Live Studio.
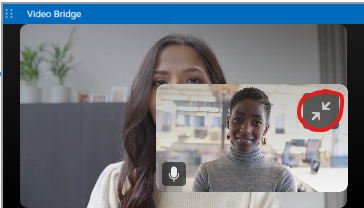
The self-preview will be hidden by default in the mini-view window. Click on the arrow icon to display your local camera preview in the mini-view window.
Note: The self-preview may now overlap with the main video in this mini-view window.
If you would like to hide your self-view from displaying in the mini-view, hover your mouse over your video stream and click the hide self-view button. This will allow you an uninterrupted view of the primary video preview.
Video Bridge Presenter Management Best Practices
There are two primary methods for managing presenters on stage during your event. Select the one that makes the most sense for your run of show plan for best results. Review these procedures with your presenters prior to the event start to ensure everyone has a clear understanding of what they are expected to do.
Host Managed
In this workflow, all presenters connect their cameras before the event starts and keep their cameras ON throughout the event. This puts control in the hands of the host to easily manage the event flow from the presenter list. They can move presenters on and off the stage and change layouts as needed for a scripted and seamless run of show.
Self Managed
In this workflow, all presenters turn their own cameras on only when they wish to be on stage. Otherwise, they keep their cameras off. This puts the control in the presenters hands and allows for a more fluid conversation throughout the event.
Also see, general presenter best practices.
Screen Sharing on the Video Bridge
Screen Sharing Setup
The ability to share your screen sharing with viewers is controlled using the Display Content Share on Webcast checkbox on the Player and Branding Options page of the setup. Screen sharing is automatically enabled on all Video Bridge events. Depending on the requirements for your event, screen sharing can be disabled in the event setup using this checkbox. 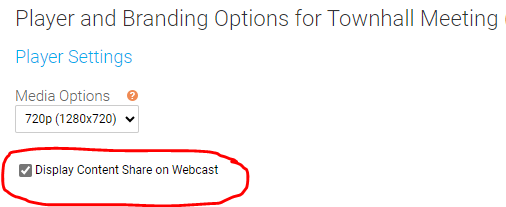
Notes:
- This setting can be enabled/disabled once the event has started.
If you want to change this setting during the event, click on the settings button next to the Primary Stream (or Backup Stream) and select the Disable Receive Shares option. This setting can be re-enabled at any time by returning to this menu. The stream needs to be connected in the Broadcast Controls window before this option is available.
When enabled/disabled for an individual presenter or the entire event, a private notification will appear at the top of the Video Bridge preview to confirm:
- Screen sharing will only be disabled by default if the event is created using a template that does not have screen sharing enabled. Copied events will have screen sharing enabled by default regardless of if the original event included screen sharing.
Video Bridge Controls
In the controls along the left side of the Video Bridge window, each presenter has the option to share their screen. Click on the screen share icon to share your screen with viewers at any time during the event.
Note: If you do not see the option to share your screen, please make sure you are using a supported browser and the hardware acceleration setting is enabled. To confirm if hardware acceleration is enabled, follow the instructions below:
Chrome Browsers:
- Launch Chrome, then select “Menu” > “Settings“.
- Scroll down to the bottom and select the “Advanced” option.
- Scroll to the “System” section and toggle “Use hardware acceleration when available” on or off as desired.
- You should now be able to join your event once Google Chrome restarts.
Edge Browsers:
- Click on the Settings and more (Alt+F) 3 dots menu icon, and click/tap on Settings.
- Click on System on the left side.
- Turn on Use hardware acceleration when available for what you want on the right side.
- Click on the Restart button to apply.
Contact Support for additional help.
How to Screen Share
When sharing your screen, a pop-up window will appear allowing you to select what content you want to share. Select one of the tabs along the top: a Chrome Tab, Window (or application), or your Entire Screen.
Under the selected tab, choose one of the available options and click Share to make your screen share active to viewers.
Note: When sharing your Entire Screen or a Chrome Tab, use the "Also share system audio" toggle share your computer's audio along with your screen.
Once active, viewers will see the selected screen share application, a small window in the top right with the camera for the presenter sharing their screen, and a shared audio feed from the video bridge. Presenters should minimize their Live Studio and begin their screen share. Once complete, click Stop Sharing to end the screen share.
Video Bridge Control Room Settings
To access the Control Room, click on the monitor icon in the Video Bridge menu. The Control Room interface allows advanced users to build entire shots ahead of time and apply changes seamlessly, all at once. This allows you to pre-select the Video Bridge layout, the webcast player layout and manage the presenters that will appear in the selected layout. This setting is only available to Admins and not guest presenters.
Click on the Presenter Layout text to select a layout for the Video Bridge. Click on the arrow icons to scroll through the available layouts or click See All to display all layout options.
Click Back to return to the main menu.
Click on the Media Layout text to select a layout for the webcast player. Click on the arrow icons to scroll through player layouts or click See All to display all layout options. Click Back to return to the main menu.
Click on the Presenter Management text to display options to manage which presenters appear in the Video Bridge layout. Voice-Activated switching is used by default, so the active speaker and most recent speakers will appear. Disable voice activated switching to manually place presenters on stage in the desired order. Click on the + icon next to a presenters name to add them to the select layout or click on the x icon next to their name to remove them from the layout. You can also drag and drop presenters between On Stage and Off Screen. All other available presenters show in the Off Screen list.
When disabled, existing spotlighting will no longer be active. The audio/video status of all presenters will appear in this view, but will not be clickable here. Note that the adaptive layout is only available when voice activated switching is enabled.
As you make changes to the settings, you'll see Reload Latest text in the top right. Click here to reset to the current layout settings that are active on the event. Click Apply to save changes to all of these settings with a single click.
Video Bridge Connectivity Guide
Overview
The Webcast platform is a webcast solution that has been supporting the largest global clients for over 20 years. We allow Presenters to connect in a variety of ways and broadcast out to audiences of 100,000+ while including interactive features such as slides, Q&A, polls, and surveys.
Additional features include:
|
|
|
|
|
|
|
|
Presenter Requirements
The Webcast platform is a broadcast product with defined roles for Presenters and participant / audience members. Network requirements for both roles can be found on our Network Requirements page. For Presenters, refer to the Webcast Presenters - Video Events column along the right for the requirements. Click Notify Me About Network Updates in the top right to sign-up to receive email updates regarding any planned network changes. We do our best to minimize updates to avoid impacting your IT and Network teams.
Please be sure to add the domain names, protocols / ports, and IP Ranges for specific to the Video Bridge. This will allow your Presenter(s) to connect their webcam(s) through their current Chrome, Edge Chromium, or Firefox browser using WebRTC. It is critical that the IPs are allowed, and not just the domain wild cards, because the connection is established using the ICE protocol, which negotiates based on IP addresses.
When adding allow rules to the network, it is important to consider how the Presenter(s) will be joining and what security solutions their video/audio traffic could be traversing. For example, will Presenters be on the corporate network on off-site? If they are off-site, will they be on VPN? For Presenters off-site and on VPN, we recommend enabling split tunnel.
Firewalls also need to have allow rules enabled to have traffic flow bi-directionally in order for Presenter(s) to share their video and to see other presenters’ videos.
With cloud security services (example: Zscaler) or other products such as cloud proxies, it is important to add allow rules using the information outlined in our Network Requirements page. When possible, we recommend bypassing proxies as a best practice.
Additionally, please be mindful of security software solutions (example: Netskope) that may be deployed in the corporate environment. Note: Netskope requires a list of FQDNs. Please reach out to support@webcasts.com and include the associated GlobalMeet webcast event ID to receive the FQDNs.
Please review our Knowledge Base article on our Video Bridge for additional information.
Connecting to Social Media for Live Streaming
The GlobalMeet Webcast platform allows the Video Bridge to be connected to an external social media site to allow the content to be simultaneously live streamed. This article will cover instructions on connecting your Video Bridge to an external site. Topics include:
How to Connect to an External Site
When you join the Live Studio for the event, the Video Bridge tab will appear by default. The event host that will be connecting to the external site needs click Join using my webcam. This allows you to initiate the Video Bridge, access to the advanced Video Bridge controls, and the ability to connect/start/end the event.
Once you have connected your webcam, click on the gear icon in the top right of the Video Bridge. Then, select Dial Out to a Presenter.
A pop-up window will appear where you can enter the details to connect to an external source. For Protocol, select "RTMP Stream". In the Destination Address field, enter the RTMP Stream where you want to connect the steam. This address will be provided by the service where you are connecting the stream. In the Optional Display Name field, enter an optional name to help you identify the stream in the Presenter List. Click Dial when you are ready to connect the stream.
Once the stream has been connected to the external service, you will be able to go live using the controls on that site.
Notes: The streaming service you are connecting to should provide the RTMP stream information to be used. Usually the URL and stream key are separate, so you will need to add a slash to the end of the URL to append the stream key.
Both RTMP and RTMPS streams are supported. For RTMPS streams, you need to include ":443" in the streaming URL.
Below are some example of how the full URLs will look:
RTMP Examples
RTMPS Examples
Common Used Sites
Below is a list of commonly used sites where you can connect the Video Bridge:
- Facebook: https://www.facebook.com/help/587160588142067/?helpref=related_articles
- LinkedIn: https://www.linkedin.com/help/linkedin/answer/a554240
- Youtube: https://support.google.com/youtube/answer/2907883?hl=en&ref_topic=9257984
Notes: Additional services can be used as long as they provide a RTMP steam where you can connect. Refer to the site's support for additional assistance on if and how to connect.
FAQs (Frequently Asked Questions)
Question: What content is shared through the external connection?
Answer: Only content seen on the Video Bridge stream will be seen on the external connection. This includes any audio and video from presenters, along with any screen shares. Slides, Surveys, Overlay Videos, Q&A, and any Custom Player Tabs will not be seen.
Onsite Encoding Requirements
Overview
This document will cover the technical requirements for a successful webcast when streaming
directly from a venue (client office, theater/hall, hotel conference center, or temporary space such as
an open field). If a location (venue) cannot accommodate any items listed, this must be addressed
during the first technical call with all parties.
Technical Requirements for Onsite Streaming Services
- An IP Address for each stream requested. Standard set-up is a primary and secondary
stream for redundancy purposes which, would mean two (2) assigned IP Addresses on two
ports. All cabling such as CAT 5/6, is to be provided by a venue representative “cable to
table”. - Each IP must have open access to the internet with the below listed requirements in place
- Publicly accessible, Static IP is preferred over a Dynamic IP - this is preferred but
private IPs with QoS will work. - Ports 80 and 1935 must be open and remain open for the full duration of any testing
or event. - Firewall, gatekeeper or other security protocols must be disabled if in place.
- IP, Alternate IP, Gateway, Subnet Mask, DNS, Alternate DNS.
- Publicly accessible, Static IP is preferred over a Dynamic IP - this is preferred but
- Network connectivity – Each encoding unit must have an individual port assigned that travels
a unique path out to the internet. If this cannot be accommodated, we recommend traveling
through separate network switch at a minimum. - Bandwidth requirements are no less than 5 Mbps per connection with standard
requirements and no less than 10 Mbps per connection for HD requirements. - Communications port – We recommend a wired third port for a communications laptop. This
is to allow for open communications without impacting any encoding device. Should this be
unavailable then a wireless network may be used in its place with the understanding that a
shared wireless network may have congestion due to usage and image communications. - One (1) dedicated phone line that can make national and/or international phone calls with an
accompanying handset - Dedicated clean power circuit of 20 AMPs with two (2) power strips/surge protectors
provided by venue.
Detailed network requirements documentation can be accessed here: https://webcasts.com/networkresources/
Broadcast Signal Requirements
The Audio Video signal requirements should be shared with any vendor secured by a client.
- Two (2) identical mixed program feeds via HD/SDI with embedded audio is recommend as a
broadcast standard. HDMI as a prosumer source may be accepted due to limitations with a
specific venue or A/V crew. - One (1) XLR mixed audio feed for audio back up.
- All Cables to be provided by the Audio/Video partner(s).
Location/Venue Logistics & Requirements
- Work area to have one (1) six-foot table with chairs accommodating up to three individuals.
Additional tables and chairs may be required should there be a need for additional
equipment and/or personnel. - Venue IT representative to be available at the location for all test times as well as the
event(s) - Any restrictions concerning access to location or venue must be communicated on the first
technical call by the client or location (venue) representative.
Glossary
- IP Address: A unique string of numbers separated by periods that identifies each computer
using the Internet Protocol to communicate over a network - Static IP / Dynamic IP: When a device is assigned a static IP address, the address does not
change. Most devices use dynamic IP addresses, which are assigned by the network when
they connect and change over time - Quality of Service (QoS): A control mechanism to provide high-quality communication over a
best-effort network by over-provisioning the capacity so that it is sufficient for the expected
peak traffic load - Network Switch: A networking device that connects devices together on a computer
network by using packet switching to receive, process, and forward data to the destination
device - Megabits per second (Mbps): A measure of data transfer speed (a megabit is equal to one
million bits) - HD/SDI: High-Definition / Serial Digital Interface
- HDMI: High-Definition Multimedia Interface
Bypassing Netskope for improved performance
Method-1 (Sample Configuration): Bypassing using Custom Firewall Application
If the exception traffic destination IP address/subnet/CIDR (or) Domains, protocol (TCP, UDP) and ports are available then this method is preferable.
Important notes:
- In the firewall application definition, it is recommended to configure fine grained custom application rules including IPaddress/Domains, protocol and ports specific to voice/video traffic.
- For IPSec/GRE GW steering methods, we recommend customers to configure equivalent bypass rules in access gateways in their client network.
- If FQDN/PQDN is used in custom firewall applications, then we need to make sure to send DNS traffic also through the cloud firewall so that the firewall can be aware of IP to domain mapping. This is needed only for IPSec/GRE GW steering methods and customers can’t configure bypass rules in their access gateways.
Configuration Steps:
- Create the Custom Firewall Application in Settings > Security Cloud Platform > TRAFFIC STEERING > App Definition with IP addresses/FQDN, Protocols (TCP, UDP) and ports.
- Add the custom application to New Application exception in Settings > Security Cloud Platform > TRAFFIC STEERING > Steering Configuration page.
Address Protocol Ports Is Bypass Required 3.238.83.128/25
3.251.93.0/26
3.133.18.38/32
3.135.139.181/32
13.51.179.176/32
13.228.200.40/32
52.76.233.79/32
52.221.167.63/32
54.253.118.63/32
54.253.248.99/32
54.253.250.85/32
54.253.254.161/32
54.254.43.153/32
165.75.5.0/24
204.141.12.0/24TCP 443,1720,1935,5060-5061,30000-50000 Yes 204.141.11.0/24
204.141.217.0/24TCP 443, 80, 8080 No 3.238.83.128/25
3.251.93.0/26
3.133.18.38/32
3.135.139.181/32
13.51.179.176/32
13.228.200.40/32
52.76.233.79/32
52.221.167.63/32
54.253.118.63/32
54.253.248.99/32
54.253.250.85/32
54.253.254.161/32
54.254.43.153/32
165.75.5.0/24
204.141.12.0/24UDP 443,1719,5060,40000-50000 Yes 204.141.11.0/24
204.141.217.0/24UDP 443, 80, 8080 No 204.141.12.0/24
3.251.93.0/26
13.228.200.40/32
54.254.43.153/32
52.206.127.180/32
34.192.154.13/32TCP 443, 40000-50000 Yes 204.141.12.0/24
3.251.93.0/26
13.228.200.40/32
54.254.43.153/32
52.206.127.180/32
34.192.154.13/32UDP 443, 40000-50000 Yes
Configuration Steps
We will configure GlobalMeet voice traffic bypass using Custom Firewall Application (Method-1).
- Create the 2 Custom Firewall Applications in Settings > Security Cloud Platform > TRAFFIC STEERING > App Definition with IP addresses/FQDN, Protocols (TCP, UDP) and ports.
Example: UDP
- Add the custom application to New Application exception in Settings > Security Cloud Platform > TRAFFIC STEERING > Steering Configuration page.
- Validate bypass location is at the client in Security Cloud Platform > Traffic Steering > Steering Configuration > Edit > Cloud, Web and Firewall > Bypass exception traffic at “Client”.

