Change a Simulated Live event from live acquisition to pre-recorded content
If you schedule a Simulated Live event to be recorded and then decide you'd rather upload pre-recorded media, you cannot convert the event directly. Instead:
- Before you begin, create a custom calendar reminder for the actual broadcast date and update the event landing page.
- Run the event briefly to create an archive that you can edit.
- Open the archive in the SimLive Studio where you can upload media and assemble and publish the event.
- Go back to the Event Settings tab and schedule the Simulated Live broadcast.
- Finally, set up follow-up emails to act as event reminders for registered attendees. For more information, see Send reminder emails for a converted Simulated Live event.
This article walks you through the process.
Jump to: Before you begin | Run and archive the event | Upload pre-recorded content and publish | Schedule the broadcast
Before you begin
The original + Add to Calendar button has the wrong date and time. Create a custom calendar reminder and replace the __REMINDERBUTTON__ auto-field with the auto-field for the custom reminder (for example, __REMINDERBUTTON1__). To learn more, see custom calendar reminders in Auto-fields for event landing pages.
Before you run the event, manually set the event date and time on the landing page so attendees can continue to register and make sure the event window stays closed while you're editing.
The event date and time on the landing page will change as you work with the event. To avoid confusion, manually set the event date and time and optionally, update the + Add to Calendar button.
To update the event date and time on the landing page:
- On the left panel, click the Registration tab.
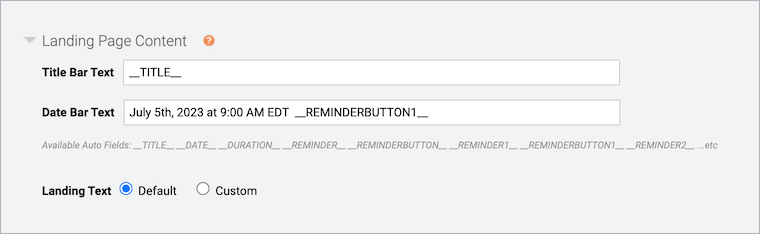
- In the Customize Event Landing Page section, open the Landing Page Content section, and next to Date Bar Text, delete the __DATE__ and __REMINDERBUTTON__ auto-fields.
- In the Date Bar Text field, enter the date and time the event will be broadcast, followed by the __REMINDERBUTTON#__ auto-field for the custom calendar reminder you created.
- Click Save and Continue.
To close the event window to attendees:
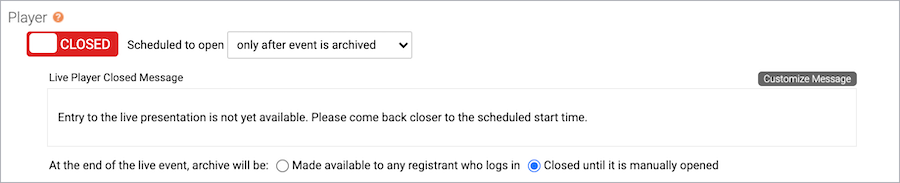
Because the event is a Simulated Live recording, the player is set to Closed until it is archived. Change the setting so that it remains closed until you are finished editing and publishing.
- On the left panel, click the Event Summary tab.
- Under Event Access, click Manage Access.
- Next to At the end of the live event, archive will be, select Closed until it is manually opened.
- Click Save Changes.
Run and archive the event
To create an archive that you can edit, run the event briefly. When you're ready, set the event date to the current day and time, and then start the broadcast.
To archive the event:
- On the left panel, click the Event Settings tab.
- Under Event Type, schedule the event to be captured immediately and click Save and Continue.

- On the Event Summary tab, under Run My Event, click Launch Live Studio.
- In the Live Studio, start the event, let the event run for a few minutes, and then end it. Once you end the event, it will automatically be archived.
Upload pre-recorded content and publish
Wait until the event is archived, then launch the SimLive Studio, upload media files, organize them on the event timeline, and finally publish the event.
Note: You can also upload media on the Event Content tab. Again, wait until archiving finishes or you will only be able to upload overlay videos.
To upload pre-recorded content:
- On the Event Summary tab, under Run My Event, click Launch SimLive Studio.
- Delete the content from the broadcast that created the archive. Under Event Timeline, right-click Live Clip 1 and click Remove Clip.
A warning message is displayed asking if you really want to delete the clip. Click Yes.
- Upload videos and audio files to the event.
- Drag the clips you uploaded to the event timeline and then click Publish All Changes.
You'll receive an email when the event has been published.
Schedule the broadcast
Now that the event is ready for broadcast, schedule it and reopen the player.
To schedule the new broadcast:
- On the left panel, click the Event Settings tab, and then click Schedule A New Broadcast.
- Select a date, time, and time zone for the broadcast, and click Save and Continue.

- To make sure attendees can access the event on the day of the broadcast, on the Event Summary tab, under Event Access, click Manage Access, set the Player option to Open, and click Save Changes.