Upload videos to play in a Live event
Uploading a Video to the Event
- Sign in to the Webcast Admin portal. Locate and edit the event.
- On the left panel, click the Event Content tab.
- Under Media Clips, click Upload a Clip.
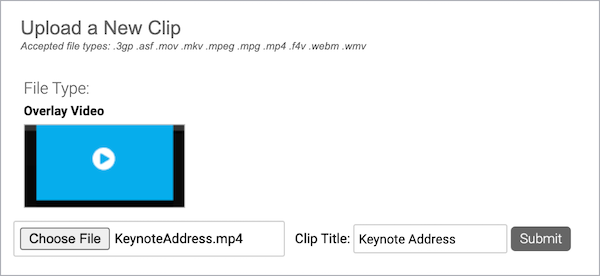
- In the Upload a New Clip window, click Choose File and browse to select the video.
- The video title is automatically generated based on the file name. If you'd like, change the clip title and click Submit.
- After the video has finished uploading, an Upload Successful message is displayed to let you know that it is being transcoded by the system. Click Ok.
- The video is displayed in the Overlay Videos section with a processing status. Once it has finished processing, you can optionally change the video title.
- Click Save and Continue to save changes to the event content.
Recommended Specs
- File Format: MP4
- Video Codec: H.264
- Video Bit Rate: 800 kbps
- Aspect Ratio: 16:9 widescreen*
- Audio Codec: AAC
- Audio Bit Rate: 96 kbps / 48 khz mono
*Tip: To avoid distortion, if you plan to share a video inline, upload a video with the same aspect ratio as the video player (16:9 for video bridge broadcasts; 4:3 or 16:9 for webcam and encoder).
Overlay Video Requirements
- Maximum Video Per Event: 10
- Maximum Video File Size: 10 GB per video
- Minimum Video Length: 15 seconds
- Audio Requirements: Must include an audio track. The audio track can be silent, but must be included.
- Supported File Formats: 3GP, ASF, MOV, MKV, MPEG, MPG, MP4, F4V, WEBM, and WMV.
For more information about video requirements, see Overlay Video Specs and Requirements.
Best Practices
- Upload videos at least 24 hours before the presentation start time.
- Use a high-speed wired internet connection when uploading video files to avoid time-outs.
Troubleshooting Tips
- Make sure the video file is at least 15 seconds long.
- Make sure the video file includes an audio track.
- Make sure your video file is a supported file type.
For additional help, contact Support.


