Bulk registration for an event
Add-on. Please contact your sales representative for additional information.
With bulk registration, you can register hundreds or thousands of attendees for an event at one time. Set up your registration form first, then upload a spreadsheet with columns for each registration question on the form (attendee names, email addresses, etc.). To learn more about setting up the registration form, see Set up the registration form for an event.
Notes:
- Bulk registration doesn’t send a registration confirmation email. Set up a reminder email to send event details to registrants.
- You can view the registrant data you uploaded in the Audience Details report. To learn more about running reports, see Run event reports.
- You can't make changes to registrant data or unregister someone once you upload the file.
Upload file requirements
Create a spreadsheet and enter registration details for each attendee you want to register.
- Supported formats include CSV, TSV, TXT, XML, XLS, XLSX
- Limit the number of registrants per upload to 2,000 or less
- Include one column for each registration field on your registration form
- For standard registration questions, label columns with the Type label

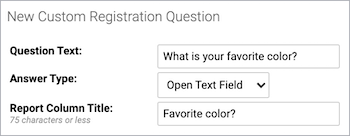
- For custom registration questions, label the columns the Report Column Title you set up

- For standard registration questions, label columns with the Type label
- For each registrant, complete all fields that you required in the registration form. Required fields can't be blank.
- Email address is always required. Each registrant's email address must be unique. Duplicate email addresses are not accepted.
- Plain text should be used. Special characters, including commas, are not supported.

Register attendees
To upload a registration list:
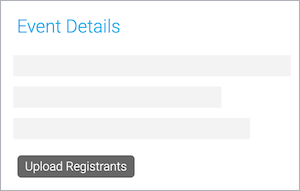
- On the Event Summary tab, in the Event Details section, click Upload Registrants.
- On the Viewer Registration Data window, click Upload data from file to select the spreadsheet and upload it.
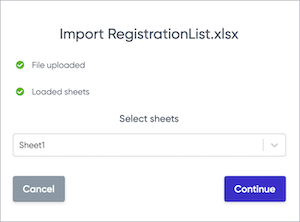
- Select the sheet you want to import the data from and click Continue.
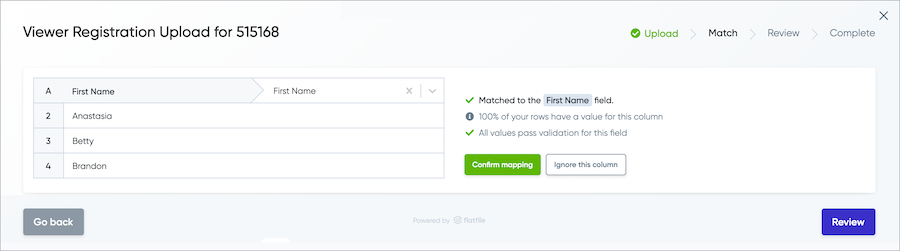
- The uploader detects the header row in the spreadsheet and matches each column to a field on the registration form. Confirm the header row and then confirm that each column is mapped correctly.
To not include a data column, click Ignore this column.

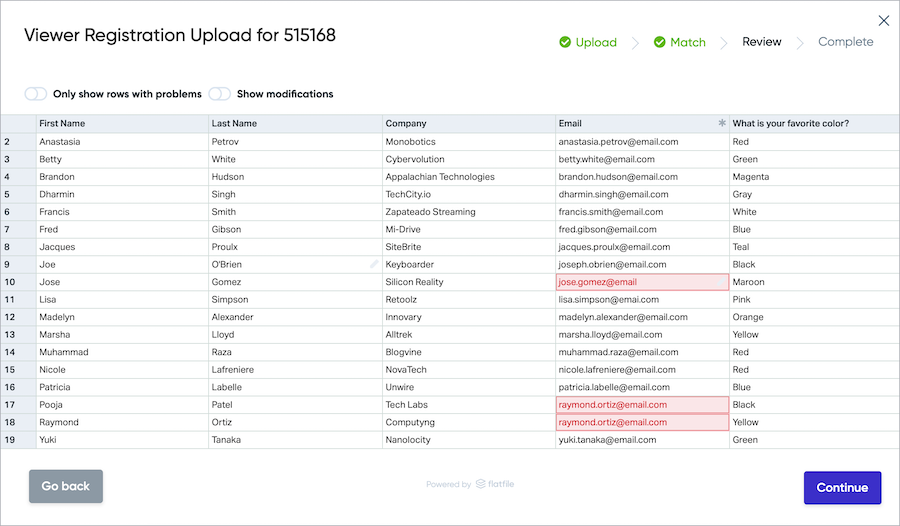
- Click Review.
- Correct any errors and edit registrant information before submitting. To only view errors that need to be corrected, set the Only show rows with problems option to ON.
Important: You can't make changes to registrant data after you submit it.

- Click Continue.
- A message asks if you're ready to submit the data. Click Yes.
The registrant list is loaded. When finished, a confirmation message shows the number of successful and failed registrations, and the attendees that weren't registered because their email address was already registered.
- Click Ok.